

Blog
10 Adorable Easter Wood Creations That’ll Make Your Home Bloom with Joy!
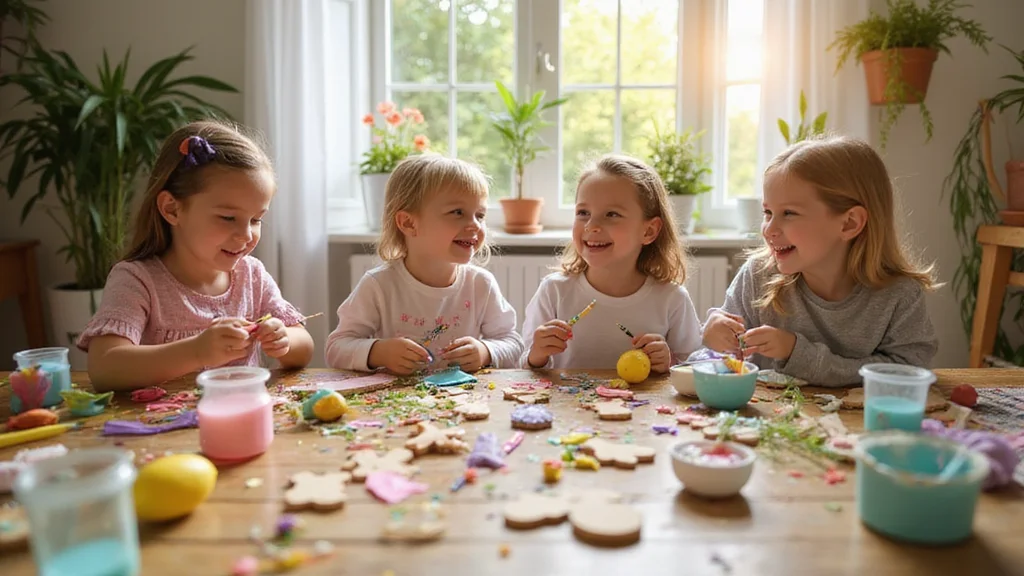
Easter is just around the corner, and this time of year always reminds me of the joyful moments spent with family, surrounded by blooming flowers and colorful decorations. As I think about how to bring that same cheerful vibe into my home, I find myself craving cute, handcrafted decor that celebrates the holiday. If you’re someone who loves to brighten up your living space with adorable touches, then this post is for you.
I’ve put together a list of 10 delightful Easter wood projects that will make your home bloom with joy. These creations are easy to make and will add a personal touch to your celebrations. Each project is filled with charm and whimsy, perfect for bringing warmth and happiness to your Easter gatherings. Whether you want something for the table, a lovely greeting for your guests, or just a fun craft to do with the kids, you’re in the right place. Let’s dive into these inspiring ideas that will surely spark your creativity!
Key Takeaways
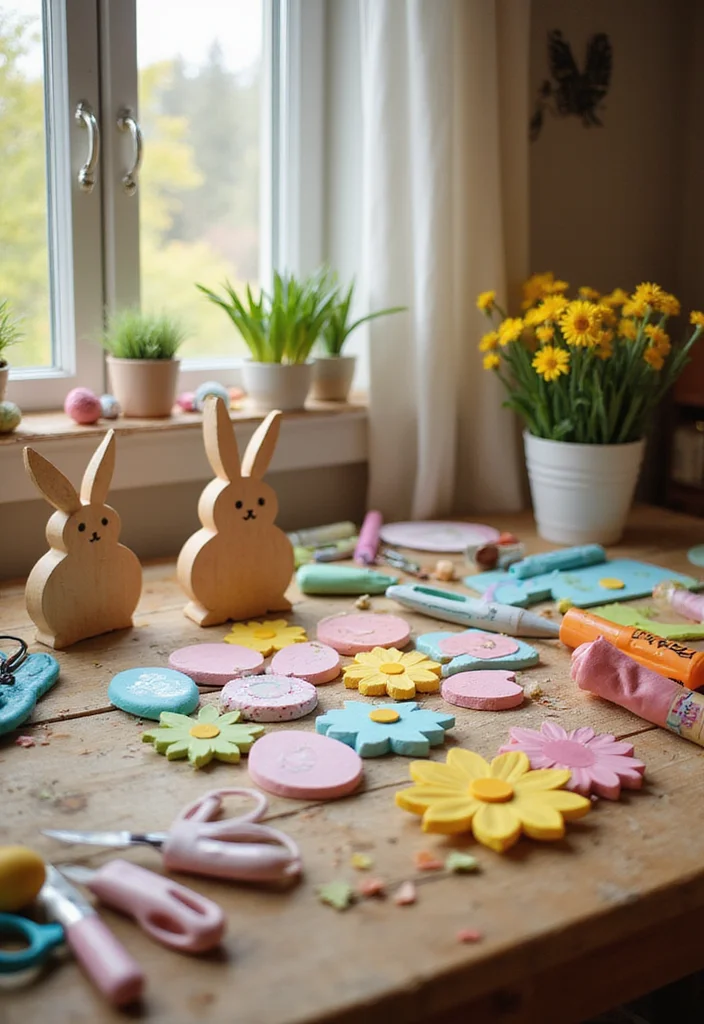
– Bunny Cutouts: Use simple shapes to create cute table centerpieces that capture the essence of Easter. These are easy to paint and customize, making them a fun family project.
– Egg-Shaped Holders: Craft colorful holders to display eggs. They not only serve a functional purpose but also add a splash of color to your decor.
– Welcome Sign: A handcrafted welcome sign can greet guests with warmth. Personalize it with your family name or a sweet Easter message.
– Wooden Bunny Family: Create a charming wooden bunny family that can be placed on shelves or tables. They add a whimsical touch that kids will adore.
– Egg Garland: String together decorative eggs to form a beautiful garland. This is perfect for hanging across a mantel or door to set a festive atmosphere.
1. Bunny Cutouts: Cute Table Centerpieces
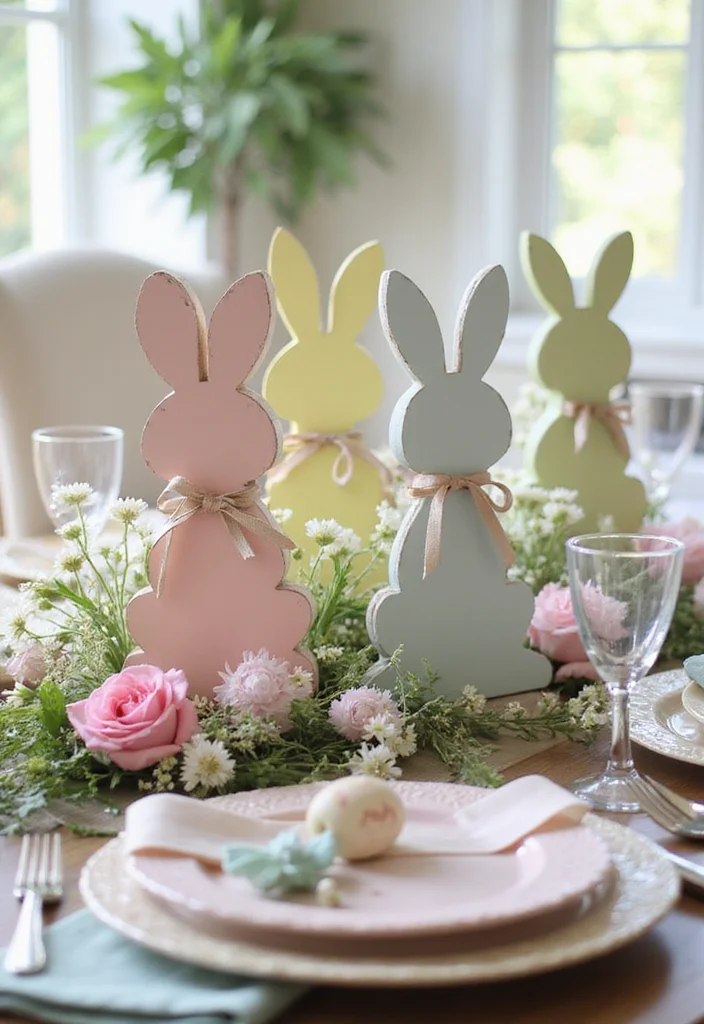
Bunny cutouts are a delightful way to elevate your Easter table decor. These charming wooden rabbits bring a playful spirit to your celebration, capturing the joy of the season in a simple yet effective design. You can easily craft them from craft wood, painting them in soft pastels for a light-hearted look or leaving them in their natural state for a rustic touch. Adding ribbons or painting sweet details can enhance their charm, making them perfect as centerpieces or placeholders for guests.To bring these bunnies to life, start with safe, non-toxic paints for a family-friendly crafting experience. Personalizing each bunny with guests’ names adds a thoughtful dimension, while varying their heights creates a more dynamic centerpiece arrangement.Consider these ideas to make your bunny cutouts stand out:
– Pair painted bunnies with fresh flowers for a vibrant display.
– Install them on cake stands for added height and interest.
– Use natural twine to create a rustic finish around their necks.
Creating these adorable bunnies will surely spark joy during your festive gatherings, enhancing the overall aesthetic with their playful presence.
2. Egg-Shaped Holders: A Splash of Color

Egg-shaped wooden holders are a fantastic way to infuse your Easter celebrations with color and creativity. These charming pieces not only serve a functional role but also act as beautiful decorative accents throughout your home. Begin by crafting egg shapes from plywood or MDF boards, painting them in vibrant colors or playful patterns. Involve your kids in the fun by letting them create unique designs, making the project a memorable family activity.To maximize the impact of your egg holders, use stencils for intricate designs that catch the eye. Adding a layer of clear varnish can protect your artwork, ensuring your creations shine bright for years to come.Here are some tips for your egg-holders:
– Use vibrant colors to brighten up your decor.
– Group smaller holders together for a cohesive look.
– Incorporate them into your table setting as charming name tags.
These delightful egg holders not only showcase your creativity but also add a cheerful vibe to your Easter festivities.
3. Welcome Sign: Greetings from the Heart
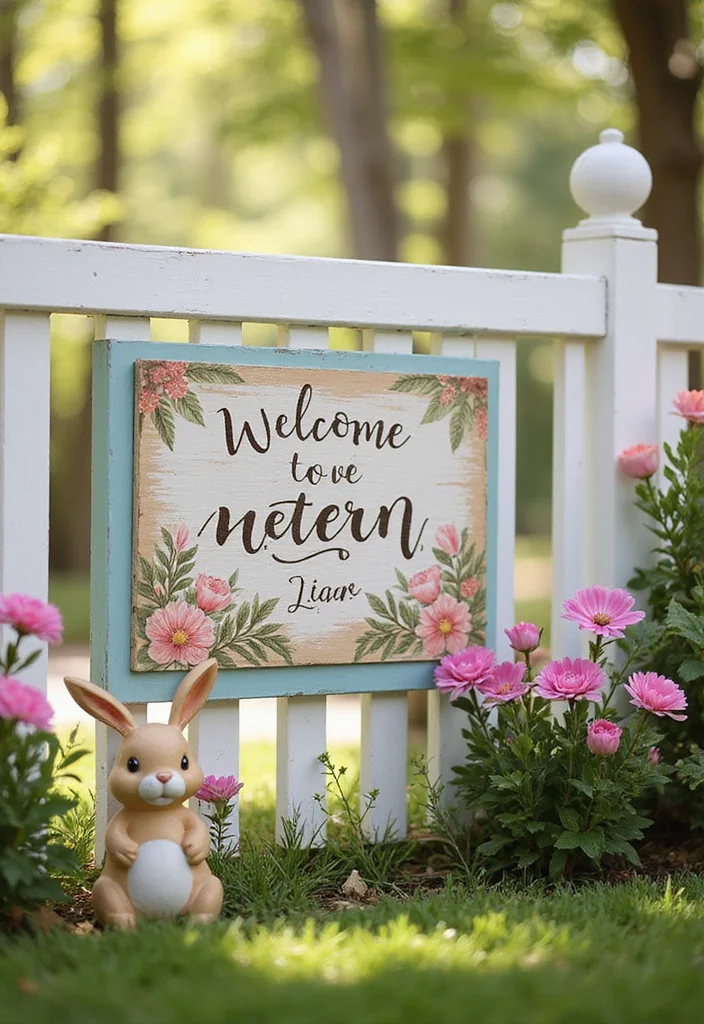
A wooden welcome sign is a lovely way to greet your guests and set a festive tone for Easter. This project invites a cheerful atmosphere right at your doorstep or entryway. Start by crafting a wooden plank and painting it in soft, inviting colors that complement your home’s aesthetic. Embellish it with cheerful spring designs like flowers or bunnies, customizing the message to reflect your warm greeting.For a professional finish, consider using stencils for your lettering. Incorporating seasonal colors allows you to refresh the look each year, while adding elements like burlap can enhance its rustic charm.Here’s how to make your welcome sign special:
– Use contrasting colors for your lettering to stand out.
– Incorporate seasonal motifs for a fresh look each year.
– Hang it at eye level for maximum visibility and impact.
This welcoming addition will undoubtedly make your home feel festive, inviting everyone to share in the joy of the season.
How To Choose The Right Easter Wood Projects
When planning your DIY Easter decor, selecting the right wood projects makes all the difference. With so many options, you want creations that not only enhance your home but also reflect your personal style. Here’s how to make the best choices:
1. Consider Your Space
Think about where you want to place your Easter decorations. Measure your space to ensure your wood projects don’t overwhelm or underwhelm the area. For example, a large bunny cutout might work well as a statement piece on your porch, while smaller decorative eggs could brighten up a dining table.
2. Choose the Right Material
The type of wood you use can affect both the look and durability of your projects. Plywood is lightweight and affordable, making it great for beginner crafts. Solid wood, on the other hand, offers a sturdier finish but can be heavier and more costly. Choose based on your skill level and the longevity you desire in your decor.
3. Evaluate the Complexity of the Project
Pick projects that match your skill level. If you’re a novice, start with simpler designs like egg-shaped holders. Advanced crafters might enjoy building a wooden bunny family with intricate details. Assess the instructions provided for each project—if they seem too complicated, consider something easier to boost your confidence and enjoyment.
4. Think About Aesthetic Appeal
Your Easter decorations should harmonize with your existing home decor. Consider colors, styles, and themes that resonate with your personal taste. For example, cheerful colors like pastels work well for spring, while natural wood finishes can provide a rustic charm. Look for projects that can be customized with paint or stains to suit your style.
5. Budget Wisely
Crafting can be budget-friendly or a bit pricey depending on the materials you choose. Make a list of the projects you’re interested in and estimate the costs for wood, paint, and other supplies. Don’t forget to include any tools you may need to purchase. Set a budget that allows for a few projects without breaking the bank.
6. Plan for Storage
After Easter, you’ll want to store your decorations safely. Choose projects that are easy to disassemble, or that can be stored flat to save space. Consider using a labeled bin to keep everything organized. This way, you can enjoy your creations year after year without worrying about damage.
Pro Tip: Before starting, gather inspiration from online platforms like Pinterest or Instagram. You’ll find endless ideas and variations that can spark your creativity and help you finalize your project choices. Planning ahead can save you time and ensure your Easter decor turns out beautifully!
4. Wooden Bunny Family: A Whimsical Touch

Create an adorable wooden bunny family to add a whimsical touch to your home this Easter. Each bunny can have its own personality, making this a fun and engaging project for the whole family. Start with various wood shapes or dowels to craft bunnies of different sizes. Paint each one in varied colors and patterns, or let the kids express their creativity with stickers and glitter for added charm.To enhance the presentation, consider using natural wood for a rustic appeal and labeling each bunny with playful names. Mixing in greenery or flowers can also create a delightful display.Here’s how to bring your bunnies to life:
– Cut various bunny shapes or use wooden dowels for different sizes.
– Group them together on a mantel for a charming arrangement.
– Add decorative elements like flowers around them for a complete look.
This whimsical bunny family will be a cherished Easter display, bringing smiles and joy to your celebrations.
5. Egg Garland: Perfect for a Festive Vibe

A wooden egg garland adds a cheerful touch to your Easter decor, perfect for draping over mantels, doorways, or tables. By using wooden egg shapes, you can paint them in delightful colors and string them together with twine or ribbon for an appealing visual. Enhance the charm further by incorporating spring-themed embellishments like flowers or butterflies, creating a festive atmosphere that everyone will love.For a dynamic look, consider hanging the eggs in layers. Mixing in shapes like bunnies or chicks offers variety, while glitter or stickers can add a playful flair.Here’s how to craft your egg garland:
– Paint wooden eggs and let them dry completely.
– Drill holes at the tops for easy stringing.
– Hang your garland where it brings the most joy!
This charming egg garland will effortlessly spread the spirit of Easter throughout your home.
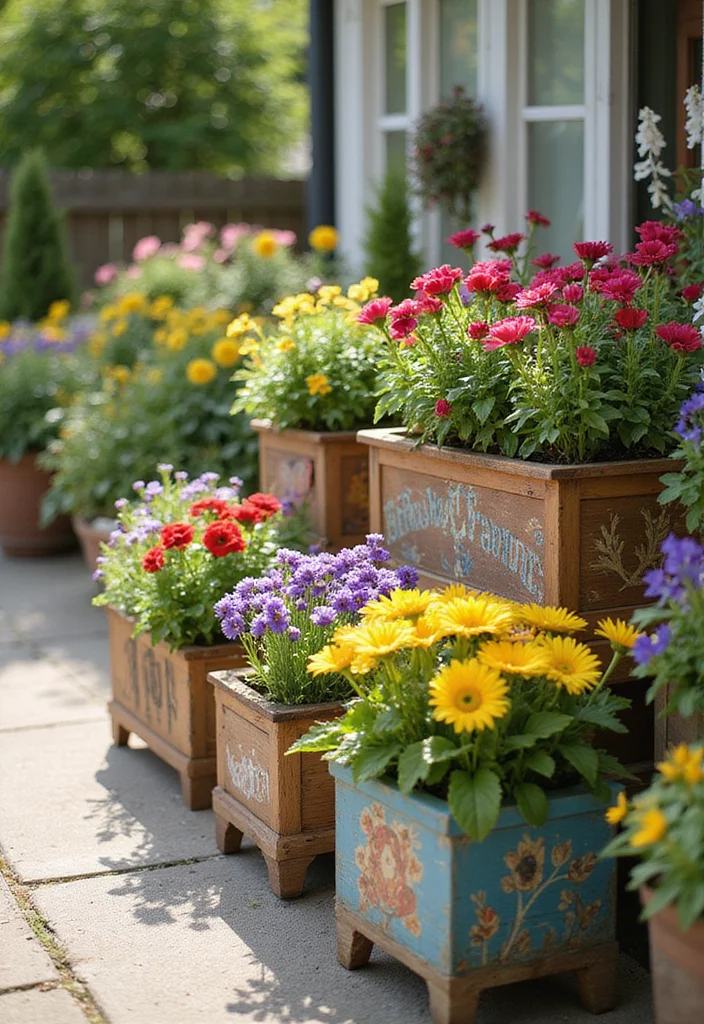
6. Mini Wooden Planters: Blooming Beauty

Mini wooden planters are a delightful way to bring nature indoors while serving as charming Easter decorations. These planters can hold small flowers or succulents, adding a burst of life and color to your space. Craft them from small wooden boxes or cut wood into desired shapes, painting or staining them in vibrant hues or natural tones to fit your decor style.To personalize your planters, consider using labels to name your plants or adding playful messages for a fun touch. Creating a small garden on a windowsill with several planters can enhance the spring vibe.Follow these steps to create your mini planters:
– Cut wood into small planter shapes and sand the edges smooth.
– Fill with potting soil and your chosen plants.
– Arrange them beautifully around your home for a lively display.
These lovely mini wooden planters will uplift your decor and breathe life into any space during your Easter celebrations.
7. Decorative Wooden Eggs: Crafty and Colorful

Decorative wooden eggs are timeless Easter decorations that can brighten your home year after year. These eggs allow for endless customization, making them a versatile addition to your seasonal decor. Start by purchasing plain wooden eggs and painting them in a variety of vibrant colors and creative designs. You can experiment with everything from simple polka dots to intricate floral patterns, or even use decoupage techniques to add fabric or paper designs.To make the most of your decorative eggs, consider combining different sizes for a more dynamic display. A clear sealant can also be applied for longevity, ensuring that your creations last through the seasons.Here are some crafting ideas for your eggs:
– Use them as eye-catching centerpieces on your dining table.
– Arrange them in decorative bowls for a festive look.
– Mix painted eggs with natural elements for a rustic touch.
These decorative wooden eggs will surely add a splash of color and creativity to your Easter holiday, enhancing any decor.
8. Wooden Chick Cutouts: Springtime Whimsy

Introduce a playful spirit to your Easter decor with adorable wooden chick cutouts! These charming figures can be creatively used in various ways, making them a beloved craft project for all ages. Craft your chick shapes from lightweight wood or thick cardboard, and let your imagination soar with colors and patterns! You can paint them, embellish with feathers, or even dress them up with tiny accessories for added fun.For visual variety, consider using different sizes, creating engaging scenes with bunnies and chicks together. Personalizing each chick with names or cheerful quotes will bring an extra smile to your decor.Here’s how to create your chick cutouts:
– Draw and cut out chick shapes from your material of choice.
– Paint and decorate them to match your Easter theme.
– Display them in your garden or around your home as whimsical accents.
These playful wooden chicks will surely bring laughter and joy, embodying the spirit of Easter in your home.
9. Wooden Flower Planters: Spring in Full Bloom
Celebrate the essence of spring with beautifully crafted wooden flower planters that brighten any corner of your home or garden. Not only are these planters functional, but they can also be designed to enhance your decor beautifully. Choose your preferred wood type, cutting it into sections to create a box-like planter, then decorate with floral designs or fresh spring colors to make them pop. Filling each planter with colorful blooms or herbs truly brings the season to life.To create visual interest, use varying shapes and sizes for a tiered garden look. Personalizing each planter with names or fun decorations can add a unique touch, while eco-friendly paint options promote sustainability.Follow these steps to create your planters:
– Cut wood into desired planter shapes, ensuring drainage holes.
– Sand and paint the planters for a polished finish.
– Fill with soil and your favorite plants, arranging them around your home.
These lovely wooden flower planters will add a vibrant touch to your Easter decor, celebrating the joy of blooming flowers in your living space.
10. Easter Box: A Special Place for Treats

Wrap up your Easter crafting journey with a delightful Easter box that holds all your seasonal treats! These wooden boxes can be personalized for each family member, creating a memorable and practical project. Construct your Easter box from wooden planks, using fun stencils to add names or festive messages that resonate with your family. Paint the boxes in bright colors and fill them with chocolates, candies, or small surprises, making them a cherished part of your holiday tradition.For added flair, consider using decorative hardware to give your boxes an elegant touch. Including fun tags for each family member’s box can enhance the personal feel, while spring motifs add to the festive atmosphere.Here’s how to create your Easter box:
– Cut wood to form a box shape, sanding edges for a clean finish.
– Paint and decorate as desired, allowing time for drying.
– Fill with treats and present them with joy to your family.
These festive Easter boxes will sweeten your holiday, providing a special place for everyone to store their favorite goodies.
Conclusion
Crafting these adorable Easter wood creations not only brings delightful decor into your home but also creates cherished memories with friends and family. Each project offers a unique way to express creativity and celebrate the beauty of spring.
As you embark on these DIY adventures, remember that the joy of crafting lies in the process, not just the end result. So grab your supplies, gather your loved ones, and fill your home with warmth and festive spirit this Easter!
Note: We aim to provide accurate product links, but some may occasionally expire or become unavailable. If this happens, please search directly on Amazon for the product or a suitable alternative.
This post contains Amazon affiliate links, meaning we may earn a small commission if you purchase through our links, at no extra cost to you.
Frequently Asked Questions
Which Easter wood projects are easiest for beginners to start with?
If you’re new to Easter wood projects or DIY Easter Decor, start with 1-2 of the simpler pieces from the list. Gather basic supplies: pine boards or plywood, sandpaper, wood glue, non-toxic paint, brushes, and a sealant. Plan first, then trace or cut shapes, sand smooth edges, dry-fit pieces, glue, and paint in soft pastel colors. Finish with a clear sealant to protect your work. Pro-tip: you can buy ready-made wooden shapes from the craft store to skip cutting and still achieve adorable results. Display on a mantel, shelf, or entry table for instant Easter charm.
How can I personalize Easter wood decorations to match my home decor?
Make it yours by choosing colors that fit your space—soft pastels or bold contrasts can work beautifully. Add texture with light distressing, wax finishes, or a gentle glaze for a vintage vibe. Monograms or initials with a stencil, or vinyl decals, give a personal touch. Hang with ribbon or twine, and layer natural elements like burlap or faux moss for depth. With these tweaks, your decorations stay cohesive with your style while staying true to your Easter wood projects.
What tools and supplies do I actually need to make DIY Easter decor at home?
You don’t need a full workshop to get chic results. Basic tools and supplies include a craft knife or scissors for tracing shapes, sandpaper, wood glue, a small drill or awl (optional), interior paint or stain, brushes or sponges, and a clear sealer. If you’d rather not cut shapes, buy ready-made wooden pieces from the craft store and assemble with glue or a hot glue gun for quick results. For hanging, grab twine or ribbon. Always wear safety goggles and work in a well-ventilated area. These essentials cover most Easter wood projects you’ll find in DIY decor.
What finishing ideas protect Easter wood projects and keep them looking fresh?
Protect your pieces with a durable, non-yellowing finish. For indoor Easter wood projects, a water-based polyurethane or acrylic sealant in matte or satin looks great. Wipe clean with a damp cloth and avoid soaking. If you love a vintage vibe, a light wax or distressed edge after sealing adds character. Reapply sealant seasonally or as needed to keep everything looking fresh and well-protected.
Which quick DIY Easter decor ideas from these wood creations deliver a high-end look with minimal effort?
A few easy, impressive ideas include: a small bunny or egg-shaped sign painted in smooth gradients; a carrot garland made from painted craft sticks tied with twine; and wood slice ornaments with hand-painted Easter motifs. Steps: trace shapes, sand smooth, apply a couple of coats of paint (or use a stencil for clean lines), seal, and hang or lay out. Pro-tip: group pieces in odd numbers and display on a tray or mantel for an elevated look. This approach is perfect for quick upgrades to your crafts and decorations.
Related Topics


