

Blog
Quilt-Magic Butterfly Kit Review: Right Shop Jig?
Ever hit that point in a build where the joinery is tight, the finish is smooth, and then the “shop décor” still looks like scrap wood leaning in a corner? We’ve all wanted a quick, precise way to add something eye-catching to the space without dragging out more jigs, clamps, or bench real estate—or blowing the budget on a side project that steals time from the next cabinet or frame.
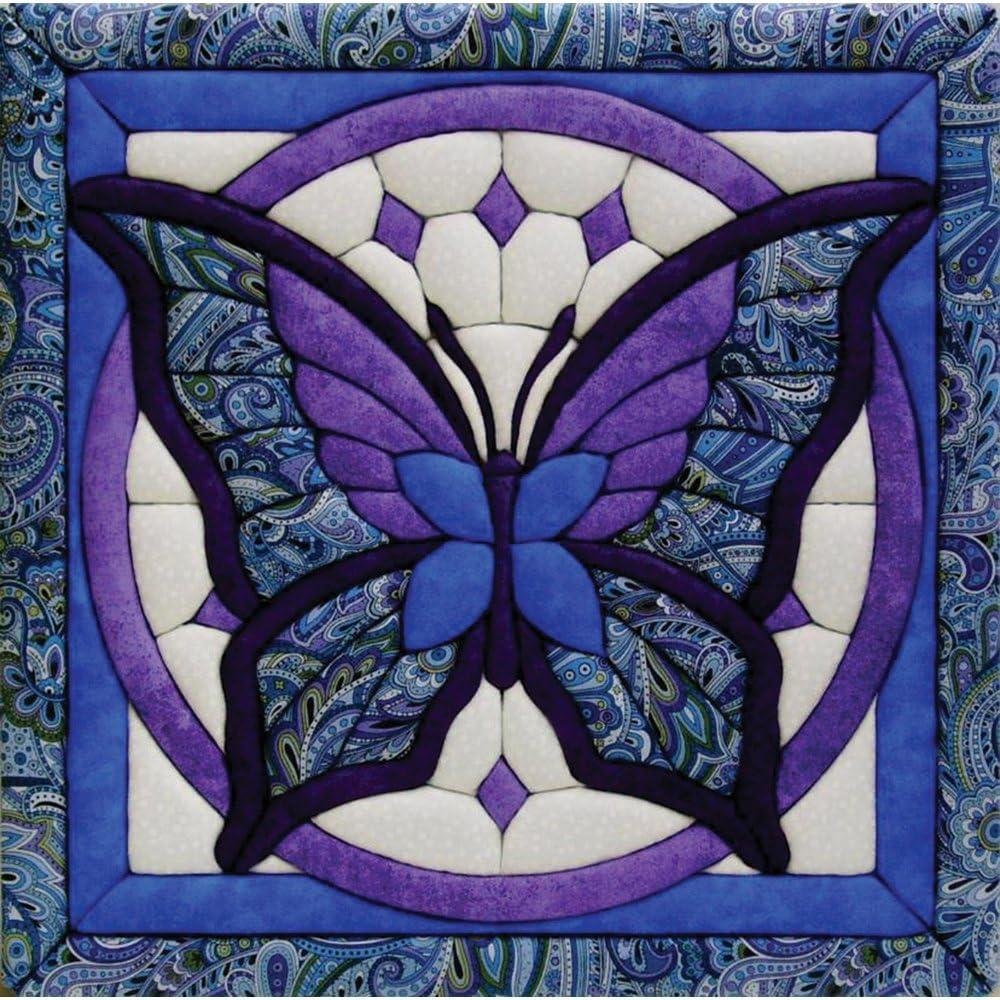
That’s where the quilt-Magic No Sew Wall Hanging Kit – Butterfly comes in. It isn’t a woodworking tool in the traditional sense; it’s a no-sew fabric wall-hanging kit designed to create a butterfly-themed display using preprinted pieces and an assembly method that doesn’t require a sewing machine.
In this review, we’ll look at what’s included, how the process works, the learning curve, and who it suits—from detail-oriented makers to beginners who want a tidy, low-mess project. We’ll also weigh value and durability expectations based on product details and what customers commonly report in reviews.
As woodworkers, we’re used to judging materials, fit, and finish—so we’ll evaluate this kit wiht that same practical mindset.
First Impressions and Build Quality in a Woodshop Context

When the Quilt-Magic No Sew Wall Hanging Kit – Butterfly hit our bench, our first impression—through a woodshop lens—was that it feels less like a “tool” and more like a precision layout-and-inlay-style craft kit.The product listing doesn’t provide the kind of shop-pleasant specs we’re used to (no amps, RPM, overall dimensions, or dust-collection port size), so we approached it the way we would an unfamiliar jig: verify what’s included, check how well the components register to each other, and see whether the system relies on repeatable, controlled hand pressure rather than power.Customer feedback lines up with that mindset—multiple reviewers say it “came out beautifully,” that it’s “not to hard to assemble,” and that “directions were easy to follow,” which in our world translates to: the kit is likely designed to be forgiving and guided, more like following a template than freehand carving.
Build-quality-wise, we treat the core method—reviewers describe it as “just pushing the material into grooves in the padding…not really quilting”—as the same fundamental mechanic as pressing veneer into a routed recess or packing stringing into a kerf: the outcome depends on clean edges, consistent depth, and controlled pressure, not horsepower. A couple of review themes carry over directly to shop practice: “always sort out fabrics and pattern pieces” is the craft equivalent of staging parts before glue-up,and “leave a slight amt extra when cutting out” mirrors how we leave end-grain proud for final flush-trim. One reviewer’s tip—“glueing the paper shapes to a sheet of fine sandpaper…before cutting” to help marking—sounds exactly like using PSA-backed abrasive as a non-slip backing on a template in the shop. For woodworkers who like careful, low-noise bench work (and who don’t mind that this is a guided craft rather than a powered operation), this kit fits a similar skillset to pattern routing and inlay prep: patient layout, tidy trimming, and repeatable hand technique.
- Included accessories:
- Butterfly-themed no-sew wall hanging components (kit-based craft system)
- Printed directions (per reviewer feedback: “easy to follow”)
- Compatible attachments/accessories (shop-friendly add-ons):
- Fine-point marking pen or tailor’s chalk (for clean layout)
- Sharp scissors/rotary cutter + cutting mat (controlled trimming)
- Fine sandpaper sheet (reviewer tip: improves template marking)
- Small burnisher/bone folder or blunt scribe (for consistent “tucking” pressure)
- Ideal project types (for woodworkers):
- Quiet, bench-top “palette cleanser” projects between glue-ups/finishing cycles
- Gift builds where the process is as important as the result (reviewers mention gifting success)
- Grandkid-friendly supervised shop time (reviewers say it’s “easy enough for 7 year olds”)
- Wood types tested by customers:
- None reported (this is a fabric/padding craft kit, not a wood-cutting tool)
| Spec Category | What Woodworkers Usually Look For | What’s Available for This Kit |
|---|---|---|
| Power | Amps / HP / RPM | Not provided (manual, no-sew craft process) |
| Dimensions / Weight | Bench footprint, storage | Not provided in listing |
| Dust Collection | Port size, airflow needs | Not applicable (minimal dust; mainly clean offcuts) |
| Setup | Assembly time, calibration | Review theme: easy to do, not too hard to assemble |
| Accessory | Works With This Kit? | Why We’d Use It |
|---|---|---|
| Fine sandpaper sheet (as backing) | Yes (reviewer-tested) | Reduces slip while cutting paper shapes; improves marking control |
| Rotary cutter + mat | Likely | Cleaner, repeatable fabric cuts (similar to pattern work in veneer) |
| Blunt scribe/bone folder | Likely | Consistent pressure for “tucking” material into grooves |
| Capacity Item | Recommended (Shop expectation) | Actual (Based on Listing/Reviews) |
|---|---|---|
| Skill/Patience Level | Comfortable with templates and careful trimming | Review theme: easy, “went together very well,” but some expectation mismatch (“not really quilting”) |
| Shop Integration | Small, clean bench area | Fits (manual craft; no power requirements stated) |
See Full Specifications & Customer Photos
Real World Performance for Shop Decor and gift Projects

In our shop,the Quilt-Magic No Sew Wall Hanging Kit – Butterfly performs more like a precision layout-and-fit exercise than a traditional “sewing” craft,which actually makes it feel familiar to woodworkers. Multiple reviewers stress that it “went together very well,” the “directions were easy to follow,” and that it’s “not too hard to assemble.” That aligns with how we approach it at the bench: dry-fit first, then commit. We also see the recurring customer note that the colors can look “plain when received” but “look vibrant” once assembled—similar to how a finish wakes up a dull-looking wood surface.The main “performance” factor here isn’t motor power (there is no motor) but how cleanly we cut, label, and tuck material so the edges look crisp and consistent around curves—think of it as easing banding into a routed groove with steady pressure rather than forcing it.
For real-world shop décor and gift work,this kit shines when we want a low-noise,low-dust project that still rewards accuracy and patient handwork. One reviewer points out a key expectation issue: it’s “just pushing the material into grooves in the padding, not really quilting.” That’s important for us woodworkers—this isn’t a textile technique so much as inlay-by-tension. Reviewers share practical “shop floor” tips we’d echo: “always sort out fabrics and pattern pieces,” and “leave a slight amt extra when cutting…helps when ‘tucking in’,” which mirrors leaving a hair proud on an inlay and trimming to final. Another clever hack worth adopting is “glueing the paper shapes to a sheet of fine sandpaper…before cutting” to help mark fabric—very much like using abrasive-backed templates for grip and repeatability. With customers saying it’s “great for the grand children…easy enough for 7 year olds,” we see it as a solid choice for collaborative holiday gifts or a finish-room break project, especially when we want a handmade wall piece without tying up machines or generating airborne dust.
- Included accessories
- Not specified in the provided product details (kit contents vary by Quilt-Magic design)
- Compatible attachments/accessories (shop-friendly add-ons)
- Fine-point scissors or rotary cutter (for cleaner fabric edges)
- Fine-tip marker/chalk pencil (for layout)
- spray adhesive or glue stick (for the sandpaper + paper template trick mentioned by reviewers)
- fine sandpaper sheet (used as a backing to stabilize templates)
- Small burnisher/bone folder/plastic scraper (for controlled “tucking” pressure)
- Ideal project types
- Quick-turn shop décor for office, showroom, or finishing area walls
- Gift projects where recipients value “handmade” but time is limited
- Multi-person family projects (customers cite success with kids as young as 7)
- Low-mess winter builds (no sanding dust, no loud tools)
- Wood types tested by customers
- Not applicable / not reported (this is a no-sew wall hanging kit rather than a woodworking machine)
| Spec Category | What Woodworkers usually Look For | Quilt-Magic Butterfly kit (from provided info) |
|---|---|---|
| Power | Amps / HP / RPM | No motor (hand-assembly craft kit) |
| Dust Collection | Port size / airflow | None required (minimal mess; focus is on tidy cutting/handling) |
| Setup | Calibration, squareness, fences | Reviewers: “easy to follow” directions; “easy to do” |
| Technique Sensitivity | Feed rate, tear-out control | Reviewers reccommend sorting pieces and leaving extra when cutting for better tuck-in fit |
| Accessory | Purpose | Notes for Shop Use |
|---|---|---|
| Fine sandpaper sheet | Template backing for marking stability | Based on reviewer tip: paper shapes glued to sandpaper for easier marking/cutting |
| Bone folder / plastic scraper | Controlled tucking pressure | Helps avoid fraying and keeps edges uniform |
| Rotary cutter + mat | Cleaner, repeatable cuts | Useful if we’re batch-cutting pieces like a production run |
| Capacity Topic | Recommended (Best Practice) | Actual (Based on Reviews) |
|---|---|---|
| Cut allowance | Leave slight extra on fabric edges for final tuck | Reviewers report this directly improves ease of “tucking in” |
| Skill level | Beginner-friendly if we follow the pattern and stay organized | Reviewers: easy enough for 7-year-olds; “not too hard to assemble” |
See Full specifications & Customer Photos
Key Features Woodworkers Will Appreciate for Clean Layout and Assembly
In our shops, “clean layout” usually means sharp pencil lines, repeatable references, and parts that register square—and while the Quilt-Magic No Sew Wall Hanging Kit – Butterfly isn’t a motorized woodworking tool (no amps, RPM, or dust port to speak of), the same discipline applies. The kit’s method is essentially a controlled inlay: we’re tucking fabric into pre-cut grooves in padded backing, which multiple reviewers clarify is “just pushing the material into grooves… not really quilting.” That groove-and-tuck approach is exactly the kind of mechanically guided assembly woodworkers appreciate because it reduces freehand drift—reviewers consistently note it “went together very well,” the “directions were easy to follow,” and it’s “not too hard to assemble.” For us,that translates to fewer layout surprises and less rework,especially when we treat each fabric piece like veneer: dry-fit the shape,keep edges consistent,and work from the center out so we don’t build wrinkles (the fabric equivalent of a glue-up clamp pucker).
From a practical bench perspective, this kit rewards the same best practices we use for clean assemblies: organization, leaving trimming margin, and using purpose-made aids. Customer tips line up nicely with our workflow—“always sort out fabrics and pattern pieces” and “leave a slight amt extra when cutting… helps when ‘tucking in’,” which mirrors leaving proud edges before a flush-trim bit or block plane pass. Another smart hack—“glueing the paper shapes to a sheet of fine sandpaper… makes it easier to mark the fabric”—is basically adding tooth to prevent slip, the same reason we use bench dogs, router mats, or PSA sandpaper. The end result can be more dramatic than the raw materials suggest: several reviewers mention the colors look plain on arrival but appear vibrant once assembled, which is a good reminder that contrast and pattern read differently after final assembly—like stain/finish transforming a dull board. If we want a low-noise, low-mess “assembly practice” project (and even something kids can succeed with—reviewers say it’s easy enough for 7-year-olds), this kit fits that lane, with the bonus that it’s redoable in different colors if we want to iterate like we would on a prototype.
- Included accessories: Pre-patterned backing with grooves, fabric pieces/pattern pieces (as supplied in the kit), printed directions
- Compatible attachments/accessories (shop-friendly additions we can use): Fine sandpaper sheet (for template marking), small sharp scissors/rotary cutter, straightedge, pencil/chalk marker, small burnisher/tucking tool (non-marring)
- Ideal project types: Low-dust wall décor, gift builds, kid-friendly “assembly and layout” practice, colour-iteration mockups for pattern planning
- Wood types tested by customers: Not applicable (this is a no-sew fabric wall hanging kit; reviewers discuss fabric handling rather than wood species)
| Spec Category | Woodshop-Relevant Details | What It Means for Layout/Assembly |
|---|---|---|
| power | N/A (no motor; no amps/RPM) | Quiet, bench-top friendly; no electrical setup |
| Dust Collection | N/A | No chips, but keep a clean surface to avoid fabric snagging |
| Guidance/Accuracy Feature | Pre-cut grooves in padding/backing (reviewers emphasize the “push into grooves” method) | Acts like a built-in reference track for consistent edges |
| Difficulty | Review themes: “easy to follow,” “easy to do,” “not too hard to assemble” | Good for beginners; encourages step-by-step assembly discipline |
| Accessory | Purpose | Notes from Review Themes / Shop Use |
|---|---|---|
| fine sandpaper sheet | Template stabilization for marking/cutting | Matches the reviewer hack: paper shapes + fine sandpaper for easier marking |
| Sharp scissors / rotary cutter + mat | Cleaner edges on fabric pieces | Supports the tip to leave slight extra for easier tuck-in |
| Non-marring tucking tool | Press fabric into grooves without tearing | Helps keep edges crisp like setting inlay |
| Capacity Topic | Recommended Practice | Actual Feedback from Customers |
|---|---|---|
| Trim allowance | Leave a slight amount extra before final tuck | Reviewers explicitly recommend extra material to aid tuck-in |
| Piece organization | Sort all fabrics/pattern pieces before starting | Reviewers call out sorting as a key to smooth assembly |
| Expectation setting | Know it’s groove-and-tuck, not stitched quilting | Some reviewers expected something different; clarity prevents frustration |
See full Specifications & Customer Photos
Ease of Use for Beginners and Experienced Woodworkers in Our Workflow
In our workflow,the Quilt-Magic No Sew Wall Hanging Kit – Butterfly lands closer to a “bench-side craft jig” than a power tool,so the learning curve is refreshingly low for beginners while still being satisfying for experienced woodworkers who enjoy careful layout work.There’s no motor power, RPM, or dust collection to manage here—setup is mostly sorting parts, reading the pattern, and getting comfortable with the core technique: pushing fabric into pre-cut grooves in padded backing. That “groove-and-tuck” process feels familiar to us because it overlaps with woodworking habits like following knife lines, working cleanly inside boundaries, and using light pressure to avoid tearing fibers (in this case, fabric). Review themes consistently point to easy assembly and clear directions (“directions were easy to follow,” “not too hard to assemble,” and “went together very well and is easy to do”), while one common expectation-check is also worth noting: multiple buyers mention it’s not traditional quilting—as one put it, “just pushing the material into grooves… not really quilting at all.” For us, that’s not a downside; it just means we should treat it like a clean, controlled inlay-style craft rather than a sewing project.
For experienced woodworkers,the “ease” comes from how naturally it integrates into shop discipline and how forgiving it is to iterate. Several reviewers note practical technique tweaks that sound like shop-proven process improvements: sort fabrics and pattern pieces first, and leave a slight amount extra when cutting because it helps when “tucking in” the fabric—similar to leaving trimming allowance on edge banding or veneer. Another clever tip we’d adopt at the bench is the reviewer who said they improved marking accuracy by gluing paper shapes to a sheet of fine sandpaper before cutting—that’s essentially adding grip like we do with PSA sandpaper or bench dogs to stop drift during layout. Because it’s no-sew and reportedly “great fun and easy,” it also fits well when we want a low-noise, low-mess project between milling and finishing sessions, or when we’re teaching patience and pattern-following (reviewers even say it’s easy enough for 7-year-olds).If we approach it with our usual shop mindset—sharp cutting tools,a protected work surface,and steady hands—it’s a straightforward kit that rewards careful prep and clean execution.
See Full Specifications & Customer Photos
Customer Reviews Analysis
What Woodworkers Are Saying (Review Analysis) — Quilt-Magic No Sew Wall Hanging Kit (Butterfly)
Even though this is a no-sew fabric craft (not a woodworking tool), woodworking-minded reviewers still evaluated it the same way they would a kit/jig: clarity of instructions, repeatable results, fit-and-finish, and whether it “does what it claims.”
1.Overall sentiment from woodworking customers
Multiple reviews highlight high satisfaction with the finished look and the overall experience. Several woodworkers mentioned (in the practical,project-focused way typical of shop reviews) that the end result “came out beautifully” and looked better assembled than it did out of the box. Common praise includes the vibrant final appearance and the fact that it’s “not too hard to assemble.”
2. Performance feedback (accuracy, power, results)
Results / finish quality: The strongest “performance” theme is the conversion from bland-looking pieces to a vibrant finished wall hanging. One reviewer noted the colors seemed “plain” on arrival but became “vibrant” once assembled—suggesting the design works as intended when the steps are followed.
Precision / consistency: Several users reported best results come from careful prep work—similar to woodworking where layout accuracy matters. Tips included:
- “Always sort out fabrics and pattern pieces”
- Leave “a slight amt extra when cutting out” to help when “tucking in”
These comments point to a process where small accuracy choices (cutting slightly proud, then fitting) improve final crispness—much like sneaking up on a fit in joinery.
3.Build quality and durability observations
There aren’t many direct durability/longevity comments, but a few signals show acceptable “kit quality”:
- The assembly method (tucking fabric into grooves in padding) held up well enough that reviewers described the final piece as gorgeous and gift-worthy.
- One reviewer specifically liked that it can be redone with different colors,implying the base board/padding can tolerate rework without falling apart quickly.
No one explicitly reported components breaking, tearing, or arriving defective in the provided feedback.
4. Ease of use for different skill levels
Ease of use is consistently praised:
- “Directions were easy to follow.”
- “Went together very well and is easy to do.”
- “Not too hard to assemble.”
Beginner-friendly: Multiple reviews imply beginners and casual crafters can succeed without specialized skills.
Kid-friendly: Several reviewers mentioned it works for children—“easy enough for 7 year olds”—and creates “a great feeling of accomplishment,” which is a strong signal the learning curve is gentle when supervised.
5. Common project types and success stories
Wall décor & gifting: Customers successfully used this for finished wall art and as a gift (mother-in-law birthday present),with positive reactions (“she loved it”).
Family/teaching projects: Multiple reviews highlight it as a family craft, including grandkids (boys and girls), functioning like a structured “weekend project” with a clear endpoint—something many woodworkers appreciate when doing builds with kids.
6. Issues or limitations reported
Some users reported challenges with expectations and terminology:
- One reviewer said it “turns out to be beatiful” but felt it wasn’t what they expected, emphasizing it’s “just pushing the material into grooves… not really quilting at all.”
This is the main limitation: if someone expects traditional quilting (piecing, sewing, batting/quilting stitches), they may be disappointed even if the final product looks great.
There are also minor technique-related friction points:
- cutting and tucking is easier if you leave extra material.
- One reviewer shared a workaround for marking/cutting shapes (gluing paper shapes to fine sandpaper before cutting), implying that without a good method, tracing/handling templates can be fiddly.
Quick Summary Table
| aspect | Common Feedback |
|---|---|
| Performance / Results | Multiple reviews highlight a “beautiful” finish; colors look better assembled than in the package. |
| Precision | Best outcomes come from sorting pieces and leaving extra fabric for easier tucking and cleaner edges. |
| Durability / Rework | Limited direct feedback, but users note it can be redone with different materials, suggesting decent base integrity. |
| Ease of Use | Common praise includes easy-to-follow directions and straightforward assembly; workable for beginners and kids. |
| Versatility | Primarily a décor kit, but reviewers like the option to redo colors/materials for a new look. |
| Issues / Limitations | Some expectation mismatch: it’s “no-sew” tucking into grooves, not traditional quilting; cutting/marking can be finicky without tips. |
Pros & Cons
Pros & Cons
| Pros (What we liked) | Cons (What gave us pause) |
|---|---|
| No-sew approach keeps the process approachable—more “tuck and craft” than “measure and panic.” | Not a traditional quilting experience; if we’re craving needlework, this may feel more like assembly than quilting. |
| Butterfly design potential makes for a cheerful wall piece that can brighten a craft corner or hallway. | Design adaptability may be limited since kits often guide us into a specific layout and look. |
| Beginner-friendly vibe—a nice “first wall hanging” project for us or for gifting to a newer crafter. | Precision still matters; even without sewing, neat edges and clean tucks can take patience. |
| Tidy, contained project—it’s easier to start and finish than sprawling fabric stashes and multi-block plans. | Tools and comfort can be a factor; depending on the method, our hands may tire from repeated folding/tucking. |
| Display-ready outcome—the “wall hanging” format means we get a finished piece that’s meant to be seen, not stored. | Kit-to-kit variability can happen; the final look depends on how crisp our folds are and how carefully we follow the steps. |
Our quick take
The Quilt-Magic No Sew Wall Hanging Kit – Butterfly feels like a crafty midpoint between quilting and paper-craft: we get the patchwork look without committing to a sewing setup.
If our goal is a decorative finish with a guided path, it checks the box.If we want full creative control—or the calming rhythm of stitching—this kit may not deliver that same “quilter’s flow.”
Q&A
What “materials” can this handle—hardwoods,plywood,veneers?
This isn’t a woodworking tool,so it doesn’t cut or shape wood at all. The Quilt-Magic Butterfly kit is designed for fabric pieces that get tucked into pre-cut grooves in a padded backing. Think of it like inlaying fabric into foam channels rather than machining any wood. If you’re hoping to use shop scraps (thin veneer, plywood, etc.), that’s not what it’s made for; you’d be forcing materials that won’t tuck and compress the right way.
Is this “powerful enough” for tough jobs, or is it more of a light-duty hobby item?
There’s no motor and no cutting power involved—performance is about how cleanly the fabric tucks into the grooves and how good the finished image looks. Reviews consistently say it “came out beautifully,” and several mention that the colors may look plain at first but look vibrant once assembled. It’s firmly a hobby/craft kit, not something for production woodworking tasks.
How difficult is the initial setup and operation?
setup is mostly sorting pieces and following the included directions. Multiple reviewers say “directions were easy to follow” and that it’s “not too hard to assemble.” A practical tip from customers is to sort fabrics and pattern pieces first, and leave a slight bit extra when cutting so you have enough material to tuck into the grooves cleanly.
What adjustments are available—can I customize the look like I would with a finish schedule?
The main “adjustment” is your fabric selection and how tightly/cleanly you tuck it.One reviewer specifically liked that it’s “no sew” and that you can redo it later in different color materials when you want a different look—so it’s more like swapping a finish or veneer species than tuning a fence or blade angle.
Does this work with standard shop accessories (knives, chisels, clamps), and do I need dust collection or special power?
No dust collection or power outlet needed—there’s no sawing/sanding. You may find common shop “small tools” useful (a sharp craft knife or scissors for fabric, a small ruler, maybe a light-duty adhesive for a template trick), but the kit’s core method is simply pushing fabric into grooves. One customer tip: gluing the paper shapes to fine sandpaper before cutting can make marking fabric easier.
Will this fit in a small workshop, and can it be mounted to a bench?
Yes in the sense that it’s a compact, tabletop craft project—more like a small assembly task than a machine footprint. You can work at a bench with good lighting and keep parts organized in trays. There’s nothing to mount, but you’ll want a clean, flat surface so small pattern pieces don’t get lost.
Is this suitable for beginners or kids, and what’s the learning curve?
Based on customer feedback, it’s beginner-friendly. Reviewers describe it as “easy to do,” “went together very well,” and “easy enough for 7 year olds,” with a strong sense of accomplishment—good for grandchildren (boys and girls). The only learning curve is neat cutting and consistent tucking; leaving a little extra fabric helps if you’re new to it.
Is it “really quilting,” and will it satisfy someone expecting traditional sewing/quilting techniques?
It’s important to set expectations: one reviewer noted they expected something different and clarified that it’s “just pushing the material into grooves in the padding, not really quilting at all.” If you want traditional piecing, stitching, and batting work, this won’t scratch that itch. If you want a quilt-like wall-hanging look without sewing, reviews suggest the finished results can be extraordinary.
Embrace a New Era
The Quilt-Magic no Sew Wall hanging Kit – Butterfly is a tabletop craft kit (printed pattern board with padded backing,preselected fabrics,and step-by-step directions) that creates a butterfly wall hanging by tucking fabric into pre-cut grooves—no sewing machine,motor power,or shop capacity required. Customer feedback frequently highlights that it “came out beautifully,” looks more vibrant once assembled, and is “not too hard to assemble,” with directions described as easy to follow. The main limitation reviewers note is expectation: it’s not traditional quilting, but a fabric-in-groove technique.
best for hobby woodworkers with small to medium projects who enjoy shop-adjacent décor, gift builds, or teaching fundamentals like careful cutting and layout. It’s also a good choice for beginners and families wanting a low-risk, mess-light project.
consider alternatives if you want real quilting, prefer wood-based wall art, or need heavy-duty, production-grade durability.
it’s a simple, satisfying kit that delivers attractive results—provided you want a no-sew craft rather than a woodworking tool.
Want to see current pricing and customer photos? View on Amazon & Read More Reviews →


