

Blog
25 DIY Wooden Cutting Board Projects You Can Make This Weekend (Get Ready for #9!)
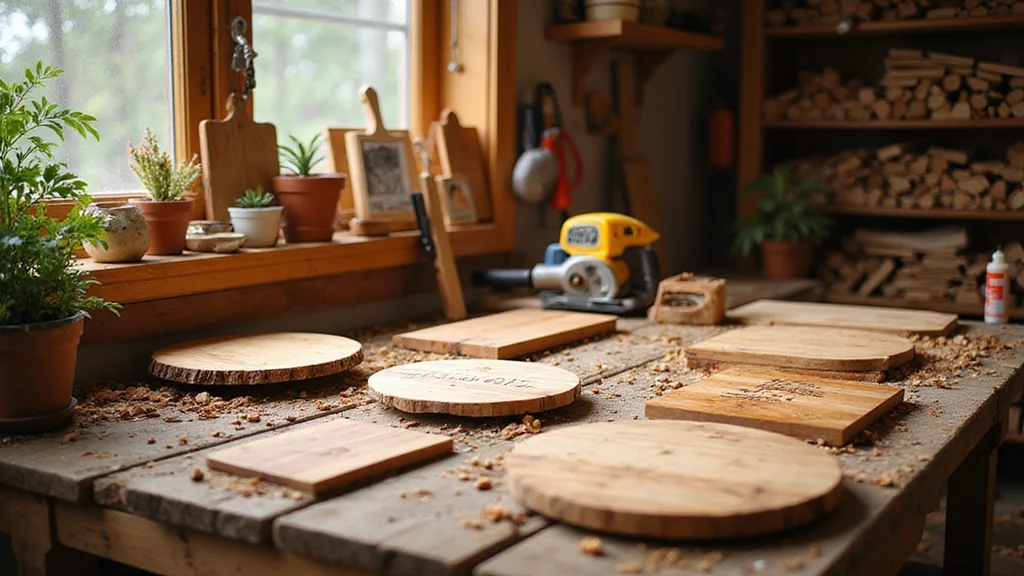
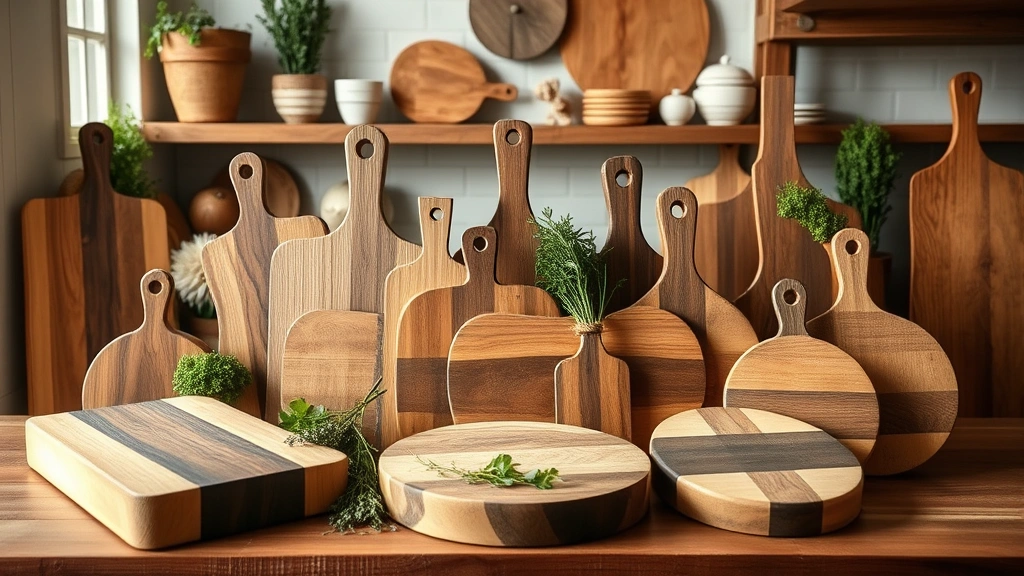
Are you feeling crafty this weekend? If you’re like many of us, the thought of making something beautiful and useful at home has a certain allure. That’s why I created this list of 25 DIY wooden cutting board projects you can easily tackle in just a couple of days. These aren’t just any cutting boards; they’re unique creations that add character and charm to your kitchen while giving you a satisfying sense of accomplishment.
If you love hands-on projects, cooking, or simply want to create something special for your home or as a gift, this post is for you. Whether you’re a seasoned DIY enthusiast or a beginner looking to dive into crafts, you’ll find inspiration here. Each project is designed to be fun, rewarding, and approachable, providing you with options that fit your skill level and available time.
By the end of this article, you’ll have a wealth of ideas at your fingertips that you can start this weekend. From classic designs to quirky shapes, you’ll discover how to make cutting boards that not only serve a practical purpose but also showcase your creativity. So grab your tools, and let’s get crafting!
Key Takeaways
– Discover 25 unique cutting board projects to fit any skill level, perfect for weekend crafting.
– Explore designs ranging from a Classic Rectangular Board to a Puzzle-Shaped Cutting Board, ensuring there’s something for everyone.
– Learn how to personalize your boards, like creating a Personalized Family Name Board, to make your gifts extra special.
– Find tips and tricks for using different wood types and styles, including Live Edge Boards and Geometric Pattern Boards.
– Get excited for the standout project, the Layered Wood Board, which combines various woods for a stunning visual effect.
1. Classic Rectangular Board
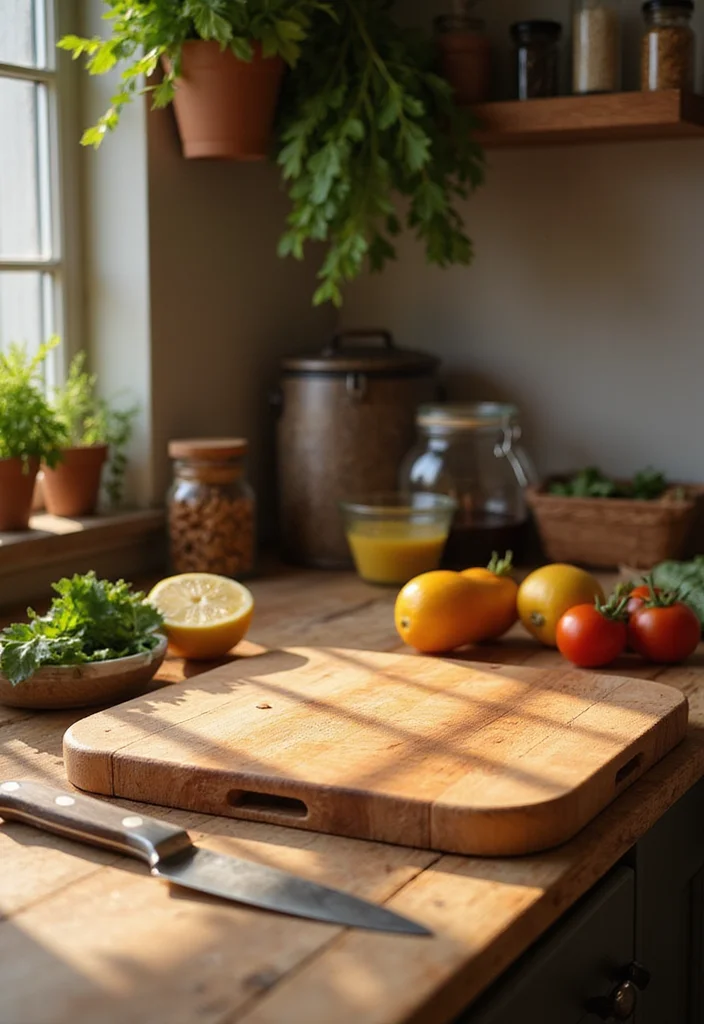
Do you need a reliable cutting surface that’s perfect for everyday cooking? The classic rectangular cutting board is just what you’re looking for. Crafted from hardwoods like maple or walnut, this board combines sturdiness with elegance, making it a kitchen essential. You can even add a custom touch with a routered edge or handle, making it easier to maneuver when chopping ingredients.
It’s incredibly easy to make, making it ideal for those new to woodworking.
Ingredients:
– 1 large hardwood plank (maple or walnut)
– Sandpaper (varying grits)
– Food-safe wood finish or mineral oil
– Router (for edges, optional)
Instructions:
1. Cut the hardwood plank to your preferred size, typically around 18×12 inches.
2. Start sanding the edges and surface with coarse sandpaper, then switch to finer grits for a polished finish.
3. (Optional) Use a router to create a decorative edge for added flair.
4. Apply a food-safe wood finish or mineral oil to preserve and protect the wood.
5. Allow the board to cure for a few hours before using it.
– Regularly oil your cutting board to keep it in top condition.
– Consider using a cutting board protector to prevent scratches.
FAQs:
– Can I use a softwood for cutting boards? No, softwoods tend to damage easily and are more prone to stains.
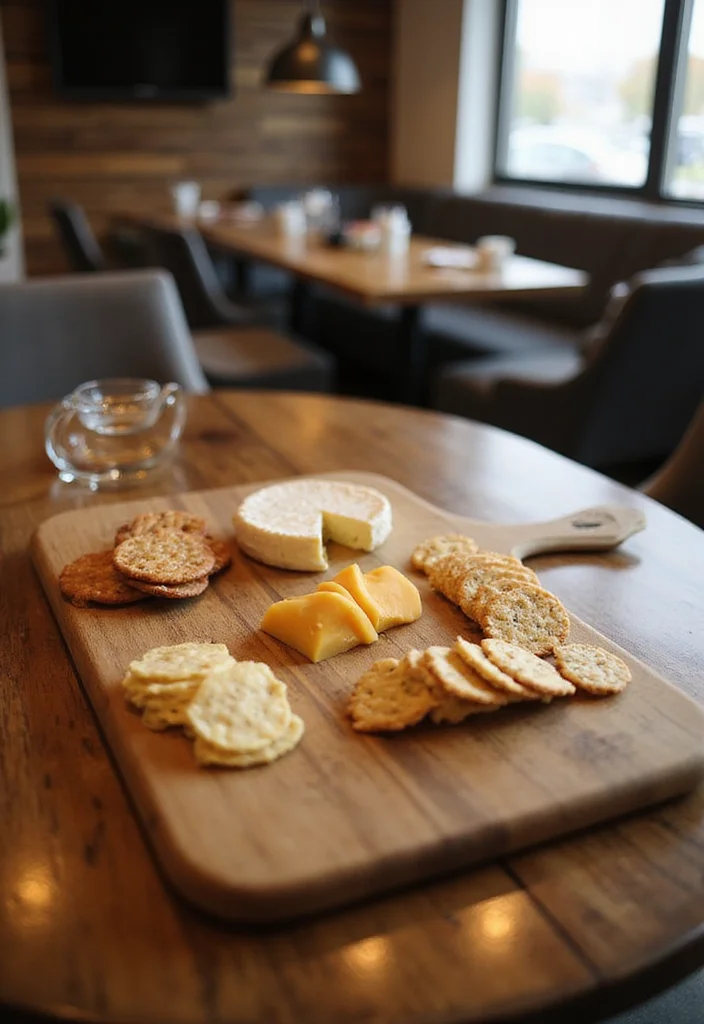
2. Round Charcuterie Board

Looking to impress your guests during gatherings? A round charcuterie board not only acts as a cutting surface but also makes a stunning serving platter. You can enhance its functionality by adding grooves to hold olives or dips. Personalizing it with an engraved name or a fun design adds a special touch that will surely catch everyone’s eye.
This project is straightforward and perfect for those wanting to blend aesthetics with practicality.
Ingredients:
– Circular hardwood piece (like cherry or oak)
– Wood engraver or wood burning tool
– Sandpaper
– Food-safe finish
Instructions:
1. Cut the hardwood into a perfect circle, typically 12 inches in diameter.
2. Sand down the edges and surface until it’s smooth to the touch.
3. (Optional) Use a wood burner to engrave your chosen design for personalization.
4. Apply a food-safe finish and let it dry completely before using.
– Use a jigsaw for more precise cuts when shaping the circle.
– Personalizing this board makes it an ideal gift for weddings or housewarmings.
FAQs:
– How do I clean my charcuterie board? Simply wash it with soap and water, avoiding soaking it.
3. Personalized Family Name Board
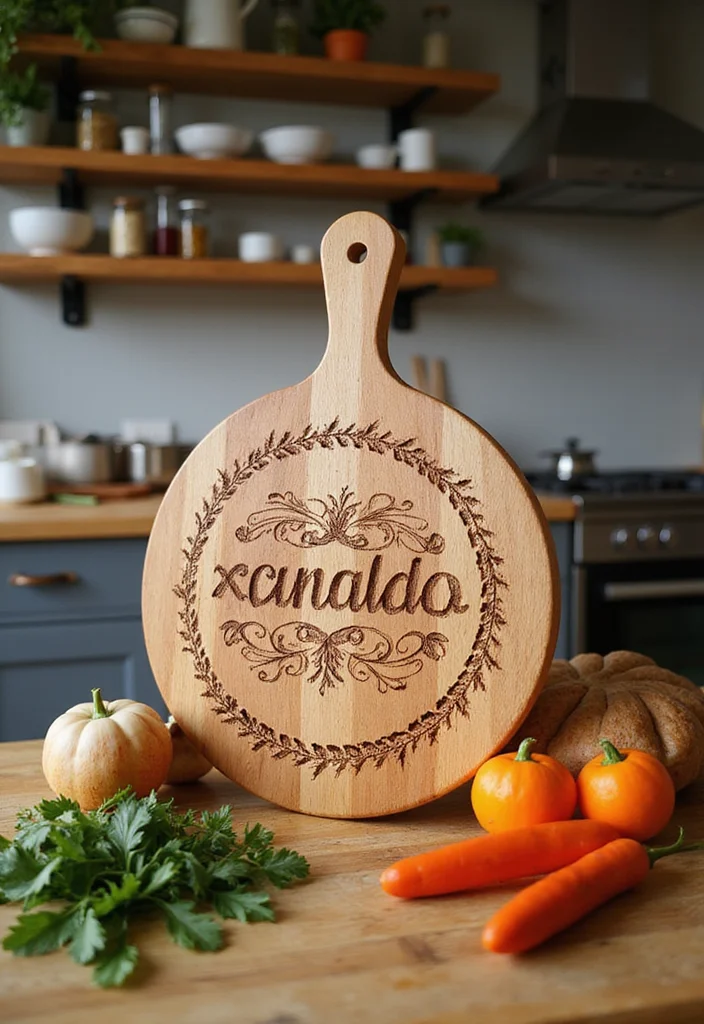
Want to add a personal touch to your kitchen? Create a cutting board that features your family name or a special date! This project not only serves as a functional tool but also becomes a cherished family heirloom. Opt for a quality wood and use a wood burner for a lasting engraving.
This board is a wonderful way to celebrate family traditions while being practical in the kitchen.
Ingredients:
– Hardwood plank (preferably maple or walnut)
– Wood burner tool
– Sandpaper
– Mineral oil
Instructions:
1. Choose a board size that fits your kitchen and usage needs.
2. Sand all surfaces until they are smooth and free of rough spots.
3. Carefully engrave your family name or a special date using the wood burner.
4. Apply mineral oil to protect and enhance the wood’s natural beauty.
– Select a font style that complements your kitchen décor for a cohesive look.
– This personalized board makes a fantastic wedding gift!
FAQs:
– Is the engraving safe for food? Yes, as long as you use a food-safe finish afterward.
4. Geometric Pattern Board
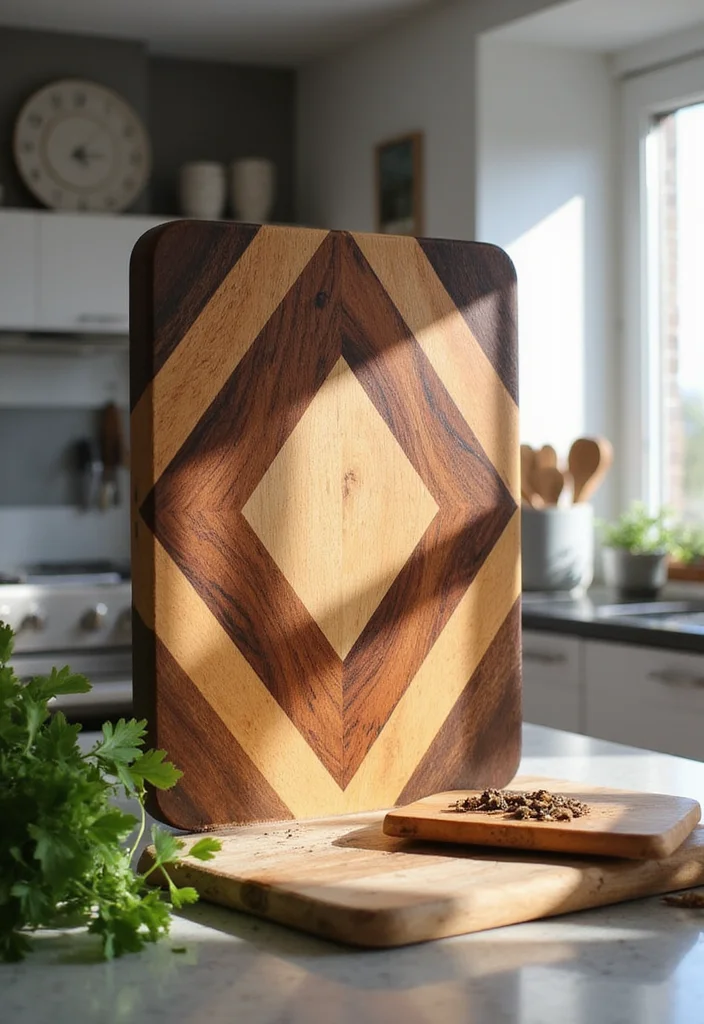
Ready to take your woodworking skills to the next level? A geometric cutting board presents a modern twist on traditional designs. By combining contrasting woods like walnut and maple, you can create stunning patterns that are as beautiful as they are functional. While this project requires some skill, the finished product is sure to impress anyone who sees it.
It’s an excellent way to showcase your creativity while crafting a useful kitchen tool.
Ingredients:
– Various hardwoods (walnut, maple, cherry)
– Wood glue
– Clamps
– Sandpaper
– Food-safe finish
Instructions:
1. Cut the wood into triangular or rectangular pieces to create your desired geometric pattern.
2. Glue the pieces together and secure them with clamps until dry.
3. Sand the entire surface thoroughly to ensure a seamless finish.
4. Apply a food-safe finish and allow it to cure completely before using.
– Plan your geometric design in advance for the most striking visual impact.
– Be patient during drying times to prevent any warping issues.
FAQs:
– Can I mix different types of wood? Yes, just ensure they are all hardwoods for durability.
How To Choose The Right DIY Cutting Board
Choosing the right DIY cutting board can enhance your cooking experience and add a personal touch to your kitchen. Here are some key factors to consider when selecting the perfect project for your weekend woodworking adventure.
1. Size
The size of your cutting board is crucial. Consider where you will use it most. If you’re working in a small kitchen, a compact board may be best. For larger food prep tasks, a bigger board gives you more space. Common sizes range from 12×18 inches for small boards to 18×24 inches for larger ones. Think about the types of food you typically prepare and choose a size that will accommodate your needs.
2. Material
The material you choose affects durability and performance. Hardwoods like maple, walnut, and cherry are popular for their strength and beauty. They resist knife marks well and are less likely to harbor bacteria than softer woods. Bamboo is another great option; it’s eco-friendly and lightweight. Make sure to avoid softwoods like pine, as they can be damaged easily by knife cuts.
3. Design & Features
Consider the design and features you want in your cutting board. Do you need a juice groove to catch liquids from meats or fruits? Would you like handles for easy lifting? Think about a reversible board for dual-functionality. You might want personalized designs, such as engraved names or patterns, especially if it will be a gift. Each design can improve the board’s utility and aesthetic appeal.
4. Budget
Your budget will play a big role in the materials and design you choose. Simple designs with standard materials will generally cost less than intricate, custom boards made from exotic woods. If you’re just starting, you might want to keep costs down by using locally available woods. Remember to factor in tools or accessories you might need, like food-safe finishes or engraving tools.
5. Skill Level
Assess your woodworking skills when choosing a project. Some designs, like a classic rectangular board, require minimal skills, while others, such as a layered wood board or a mosaic inlay, may need advanced techniques. If you’re a beginner, opt for simpler designs while practicing your skills. As you gain confidence, you can tackle more complex projects.
6. Maintenance and Care
Different materials require different maintenance. Hardwoods usually need regular oiling to maintain their finish and prevent drying out. Bamboo boards are generally easier to clean and maintain but may require occasional conditioning as well. Research how to care for your chosen material to ensure your cutting board lasts for years.
Pro Tip: Start with a simple project like the Classic Rectangular Board. It’s a great way to practice your skills without feeling overwhelmed. As you build confidence, you can take on more intricate designs, making your DIY cutting board weekend not just productive but also fun!
5. Live Edge Board
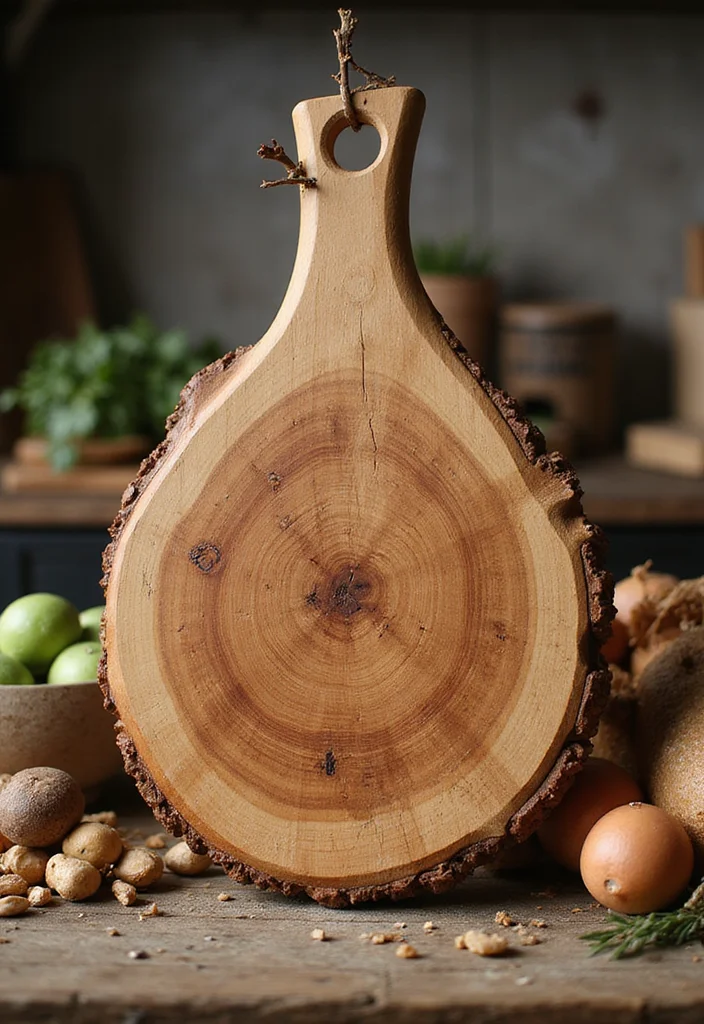
If you appreciate the beauty of natural wood, a live edge cutting board is sure to delight you. This rustic style highlights the wood’s bark and grain, making each board unique. Not only is it perfect for cutting, but it can also serve as an eye-catching centerpiece for serving food at gatherings.
Creating this board is a fantastic way to celebrate the natural allure of wood in your home.
Ingredients:
– A slab of live edge hardwood (such as oak or cherry)
– Sandpaper
– Food-safe finish
Instructions:
1. Find a beautiful slab of live edge wood that showcases interesting features.
2. Sand the surface to highlight the natural grain and smooth any rough patches.
3. Apply mineral oil to enhance the color and protect the wood from moisture.
– Look for unique shapes in the wood for added character.
– This board is perfect for rustic-themed events or casual gatherings.
FAQs:
– Can I use a live edge board for cutting? Yes, as long as it’s properly treated with food-safe oils.
Live Edge Board
Editor’s Choice


6. Engraved Recipe Board
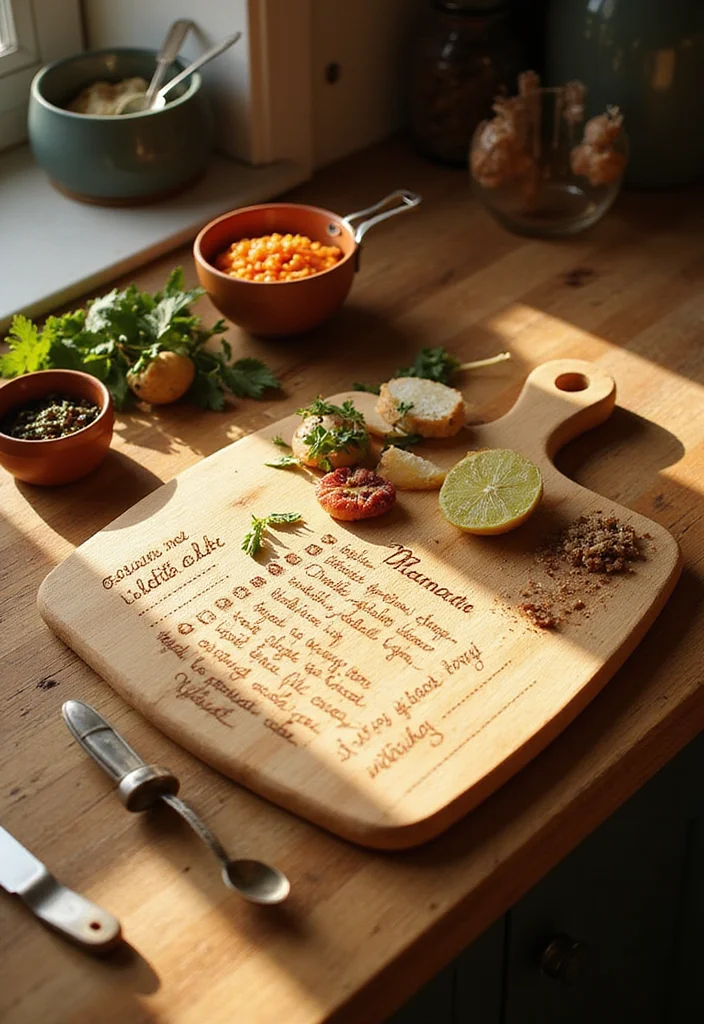
Looking for a special way to preserve your family recipes? Create a cutting board that doubles as a recipe holder! By engraving your favorite recipe directly onto the surface, you’ll not only keep a cherished memory alive but also have a functional kitchen tool that sparks conversation.
This unique project combines functionality with nostalgia, making it a must-have for any home cook.
Ingredients:
– Hardwood board
– Wood burner tool
– Sandpaper
– Wood oil or finish
Instructions:
1. Choose a recipe that holds special meaning to you and your family.
2. Sand the board to prepare a smooth surface for engraving.
3. Use the wood burner to carefully etch the recipe onto the board, ensuring clarity.
4. Finish with a food-safe oil to protect the engraved design.
– Consider using a tablet stand for displaying the recipe while cooking.
– Personalize it further with your family name for an added touch.
FAQs:
– Will the recipe wear off? No, as long as it’s properly sealed and cared for.
📹 Related Video: DIY Handwritten Recipe Laser Engrave With Glowforge | How To Make A Handwritten Recipe Cutting Board
7. Themed Holiday Boards

Why not celebrate each holiday with a themed cutting board? Whether it’s Halloween, Christmas, or Thanksgiving, you can create boards that reflect the spirit of the season. By painting festive designs or engraving cheerful quotes, you’ll add a personal touch that enhances the joy of your gatherings.
This project is a fun way to get creative while preparing for special occasions.
Ingredients:
– Hardwood board
– Paint or wood burner
– Sandpaper
– Food-safe finish
Instructions:
1. Select a design that fits the holiday theme you want to celebrate.
2. Sand the board until it’s smooth and clean.
3. Paint or engrave your chosen design onto the board.
4. Seal it with a food-safe finish to protect your artwork.
– Consider making a set of boards for a complete holiday theme!
– Use stencils for more intricate designs if you want.
FAQs:
– Can I use these boards for food? Yes, as long as they are finished properly.
8. Small Travel Board

Do you love picnics or camping? A small travel cutting board is just the right companion for your outdoor adventures! These compact boards are lightweight yet durable, making them perfect for slicing and serving food on the go. You’ll find them essential for any outdoor chef who values convenience and functionality.
This project is simple and practical for anyone who enjoys cooking outside.
Ingredients:
– Small hardwood piece (like birch)
– Sandpaper
– Food-safe finish
Instructions:
1. Cut the board into a manageable size, about 10×6 inches for easy handling.
2. Sand the surface thoroughly to achieve a smooth finish.
3. Apply a food-safe finish before packing it away for your trip.
– Keep it lightweight for easy transport.
– This board is great for quick meals on the go!
FAQs:
– Can I bring this on a camping trip? Yes, it’s perfect for outdoor use!
9. Layered Wood Board – Get Ready for This One!

Are you ready to showcase your woodworking skills? The layered wood cutting board is a stunning example of craftsmanship. By using strips of different types of wood, you create a beautiful mosaic effect that will grab anyone’s attention. While this project requires a bit more skill, the impressive results will be worth the effort!
This board not only serves a practical purpose but also adds a decorative touch to your kitchen.
Ingredients:
– Various hardwood strips (walnut, maple, cherry)
– Wood glue
– Clamps
– Sandpaper
– Food-safe finish
Instructions:
1. Cut your hardwood into identical strips, ensuring uniformity.
2. Glue the strips together in a layered fashion and clamp them securely.
3. Once dry, sand the entire board smooth for an even finish.
4. Apply a food-safe finish to complete the project.
– Plan out your color pattern ahead of time for a balanced visual appeal.
– This board also makes for an amazing centerpiece in any kitchen!
FAQs:
– Is it difficult to make? It requires some patience, but the effort is absolutely worth it!
Layered Wood Board – Get Ready for This One!
Editor’s Choice


10. Cutting Board with Juice Groove

Do you love cooking with juicy ingredients? A cutting board with a juice groove is a practical solution for anyone who enjoys making meals. This feature prevents spills from running off the board, keeping your workspace clean and tidy. Plus, it adds a professional touch to your kitchen setup!
This project is simple yet incredibly useful for any home chef.
Ingredients:
– Hardwood board
– Router (for juice groove)
– Sandpaper
– Food-safe finish
Instructions:
1. Cut your board to size, around 18×12 inches for ample space.
2. Use a router to create a groove around the edge to catch juices.
3. Sand the surface for a smooth finish.
4. Apply food-safe oil to enhance and protect the board.
– This board is great for meats and juicy vegetables!
– It makes a thoughtful gift for anyone who loves to cook.
FAQs:
– Is the juice groove necessary? It helps keep things cleaner and more organized!
You might also like

11. Colorful Painted Board
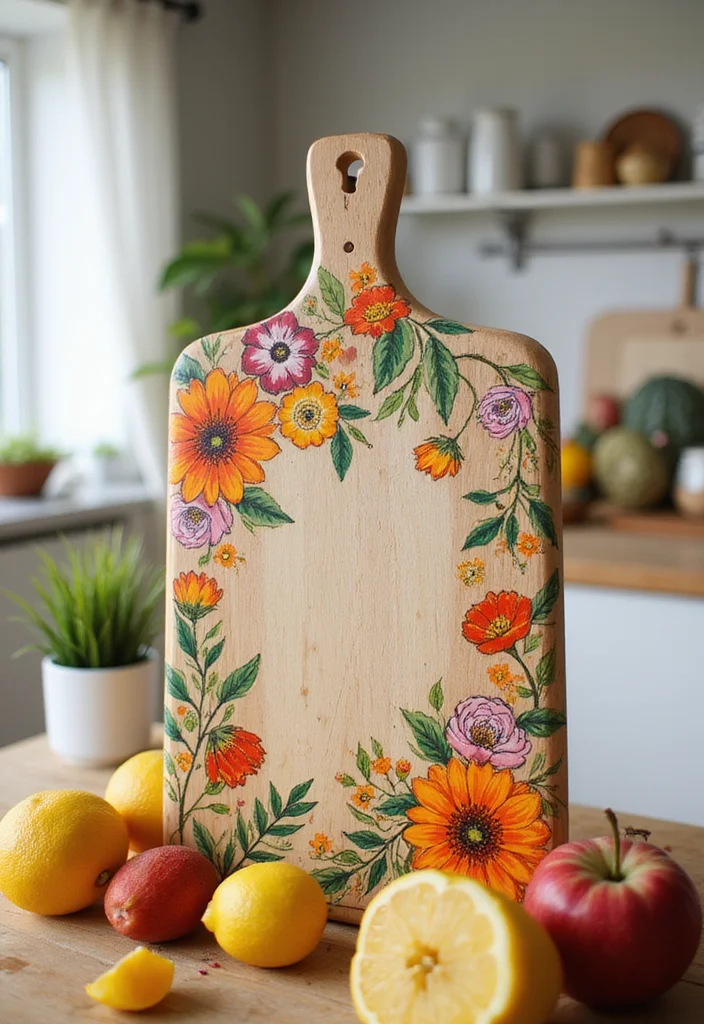
Are you looking to add a splash of color to your kitchen? A painted cutting board can be a fun and vibrant addition! Using food-safe paints, you can create a colorful masterpiece that is both eye-catching and functional. This board is perfect for themed parties or simply to brighten up your cooking space.
This project is great for anyone looking to express their creativity in the kitchen.
Ingredients:
– Plain hardwood board
– Food-safe paints
– Paintbrushes
– Sandpaper
Instructions:
1. Start with a clean, sanded board to prepare for painting.
2. Plan your painting design and apply the first layer of paint.
3. Allow it to dry thoroughly before adding additional coats for depth.
4. Seal with a food-safe finish to protect your artwork.
– Use stencils for intricate designs if desired!
– This board makes for a fantastic gift for creative friends.
FAQs:
– Can I wash it like a regular board? Yes, just be gentle to preserve the paint.
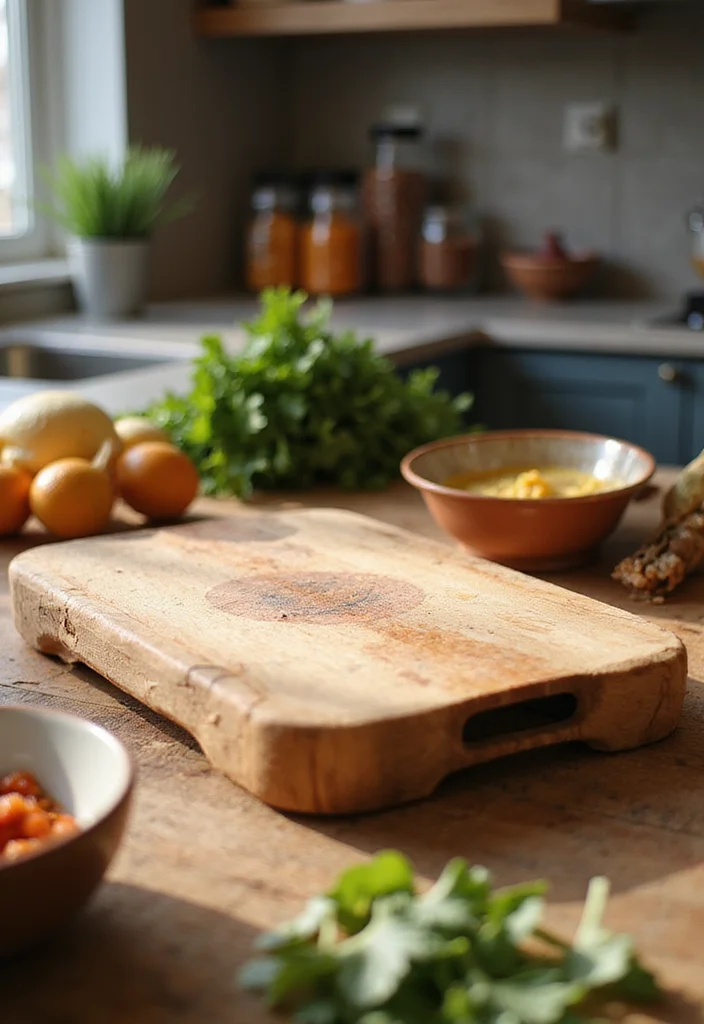
12. Multi-functional Board with Handles
Want a cutting board that’s as functional as it is attractive? Create a board with integrated handles for easy transport! This design makes it simple to carry from the kitchen to the dining table, perfect for serving appetizers or cheese. Plus, the handles add a unique touch to the board’s overall aesthetic.
This project is practical and stylish for any home chef.
Ingredients:
– Hardwood board
– Router for handles
– Sandpaper
– Food-safe finish
Instructions:
1. Cut the board to your desired size for optimal functionality.
2. Use a router to create grips on either side for easy handling.
3. Sand the entire surface to achieve a smooth finish.
4. Apply a food-safe finish to seal and protect the wood.
– Perfect for gatherings where you need to transport food effortlessly!
– Consider adding a decorative touch on the front for added style.
FAQs:
– Will the handles affect my cutting? No, if done properly, they won’t interfere at all.
13. Bread Board with Slicing Guide
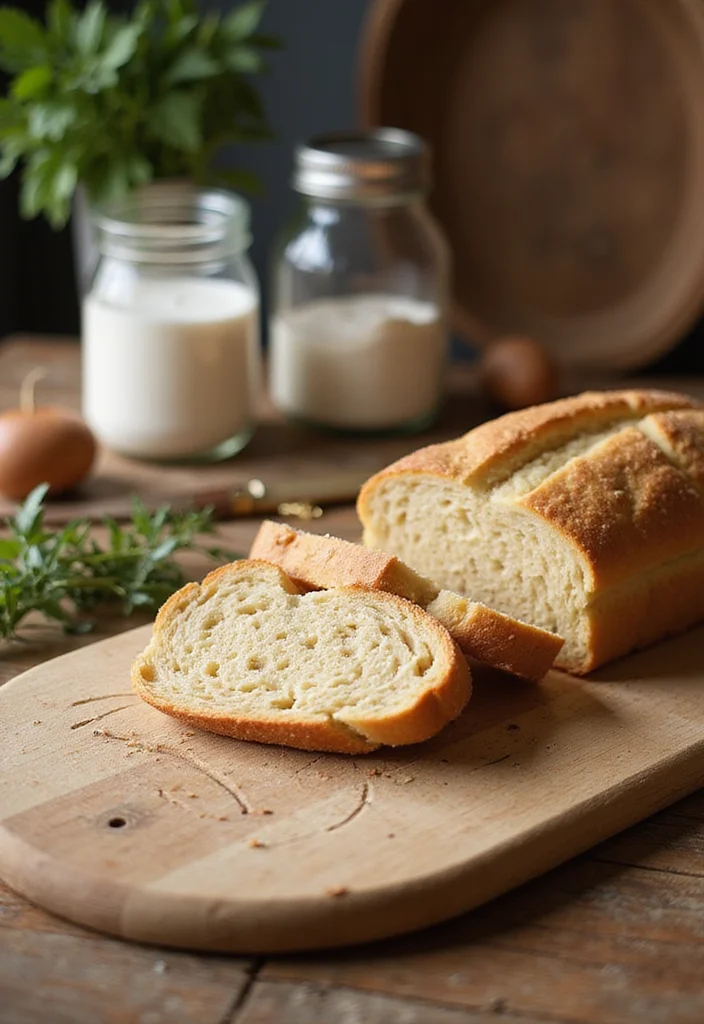
Are you a bread enthusiast? A bread board with an integrated slicing guide is a must-have! This board not only provides a cutting surface but also helps you achieve perfectly sliced loaves every time. Adding a rustic design enhances its charm, making it a delightful addition to your kitchen.
This project is perfect for anyone who loves baking at home.
Ingredients:
– Hardwood board
– Router for carving slice guides
– Sandpaper
– Food-safe finish
Instructions:
1. Cut the board to size, typically around 16×10 inches for versatility.
2. Use a router to carve slicing guides at equal intervals across the surface.
3. Sand the board until it’s smooth, paying extra attention to the guides.
4. Apply a food-safe finish to protect your board and enhance its longevity.
– Ideal for homemade bread enthusiasts!
– Keep a dedicated knife just for slicing bread.
FAQs:
– Can I use this for other foods? Yes, but it’s specifically designed for bread to ensure effective slicing.
14. Kids’ Activity Board
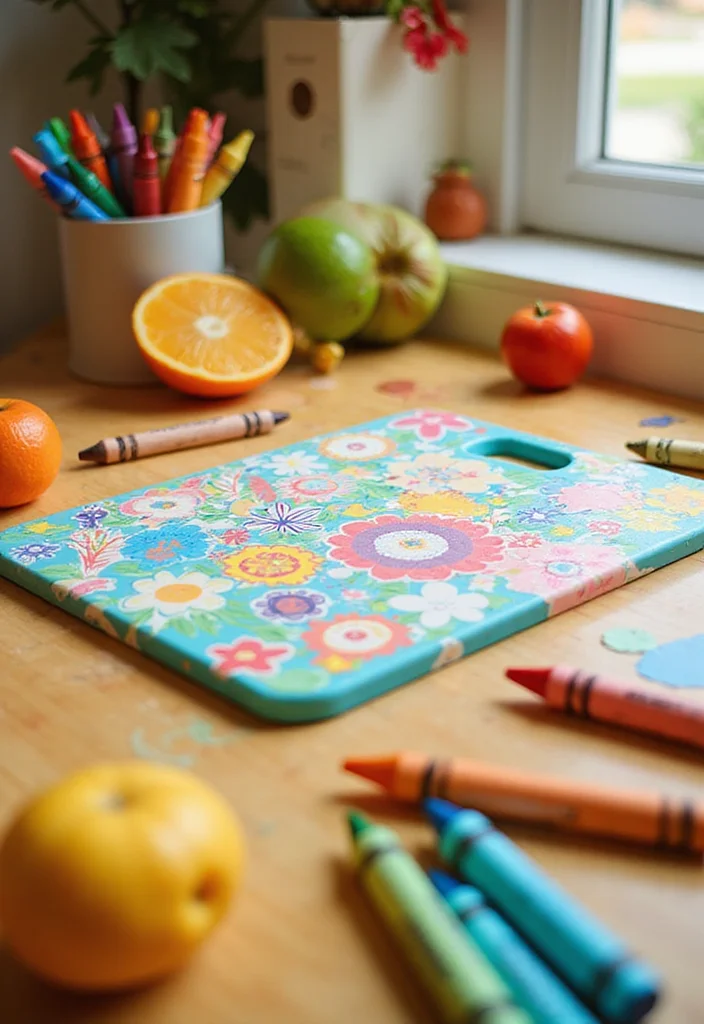
Looking for a fun way to get kids involved in the kitchen? Create a colorful cutting board that encourages them to join you in cooking! Using bright colors and simple designs makes it appealing to children. This board can also serve as a great teaching tool, turning cooking into a shared family activity.
This project is simple and engaging for young chefs in the making.
Ingredients:
– Softwood board (like pine)
– Child-safe paint
– Sandpaper
– Food-safe finish
Instructions:
1. Start with a sanded softwood board to prepare for painting.
2. Let the kids unleash their creativity by painting their favorite designs on it.
3. Seal it with a food-safe finish once the paint is dry.
– Use washable paint for easy cleanup after crafting.
– Make it interactive by adding fun shapes or stencils for added enjoyment!
FAQs:
– Is it safe for kids to use? Absolutely, just supervise them while cutting!
15. Puzzle-Shaped Cutting Board

Want to add a whimsical touch to your kitchen? A puzzle-shaped cutting board is not only fun, but it also serves as a unique design piece! This creative project can brighten your cooking space and provides an excellent opportunity to create multiple pieces for a playful serving platter.
This board is perfect for those looking to combine function with a bit of fun.
Ingredients:
– Various hardwood pieces
– Jigsaw for intricate cuts
– Sandpaper
– Food-safe finish
Instructions:
1. Plan and sketch your puzzle design on paper for guidance.
2. Use a jigsaw to cut the pieces from the hardwood carefully.
3. Sand each piece thoroughly for a smooth finish.
4. Apply a protective food-safe finish to keep it in great shape.
– Create multiple pieces for a unique serving experience at gatherings!
– This board also makes a great gift for kids’ parties!
FAQs:
– Will the pieces fit together? Yes, as long as they are cut correctly!
16. Sushi Cutting Board

Craving sushi? Bring a piece of Japan into your kitchen with a sushi cutting board! This specialized board assists in rolling sushi and slicing fish, designed to be smooth and non-porous so it doesn’t absorb moisture. Ensuring durability and cleanliness, this board is an essential tool for sushi lovers.
This project is perfect for anyone who enjoys making sushi at home.
Ingredients:
– Bamboo or hardwood board
– Sushi knife
– Sandpaper
– Food-safe finish
Instructions:
1. Cut your board to a suitable size for sushi preparation, typically around 12×12 inches.
2. Sand the edges and surface until smooth for easy use.
3. Apply a food-safe finish to protect against moisture and enhance longevity.
– This board is great for both sushi making and serving.
– Regularly oil it to maintain its condition and prevent drying out.
FAQs:
– What makes this board special? It’s specifically designed for sushi preparation!
17. Slanted Cutting Board

Do you want a cutting board designed for ease of use? A slanted cutting board allows you to slice without excessive bending, making it more ergonomic. This design is particularly beneficial for those who spend a lot of time preparing food, offering both comfort and efficiency.
This project is thoughtful and practical, especially for home cooks.
Ingredients:
– Hardwood board
– Wood glue
– Sandpaper
– Food-safe finish
Instructions:
1. Cut the board to a size that fits comfortably in your hands for ease of use.
2. Create a slant by gluing an angled piece to the base to elevate one side.
3. Sand the edges and surface for a smooth finish.
4. Apply a food-safe finish to seal and protect the wood.
– Perfect for chopping herbs and vegetables with ease!
– Consider integrating a juice groove to enhance functionality further.
FAQs:
– Is it hard to use? Not at all, it’s designed for comfort and ease!
18. Composite Cutting Board
Are you looking for a durable cutting board? Composite cutting boards are made from various wood particles, creating a solid surface that resists warping and is perfect for heavy-duty kitchen tasks. They maintain their beauty over time with minimal maintenance, making them a smart choice for busy kitchens.
This project is ideal for anyone seeking functionality and longevity in their kitchen tools.
Ingredients:
– Composite wood pieces
– Wood glue
– Sandpaper
– Food-safe finish
Instructions:
1. Cut your composite pieces into the desired shapes and sizes for your board.
2. Glue them together, ensuring a tight bond for durability.
3. Sand the entire surface to achieve smoothness for easy cleaning.
4. Apply a food-safe finish to protect your board.
– These boards are versatile for meat, veggies, and more!
– Regular maintenance can significantly extend their life.
FAQs:
– Are composite boards better than traditional ones? They offer more durability, making them great for heavy use.
You Might Also Like
19. Sushi Rolling Board

If you love making sushi, a sushi rolling board is a kitchen necessity! This board assists in rolling sushi while keeping your nori flat and stable. Additionally, it can double as a beautiful serving tray to showcase your culinary creations.
This project is ideal for sushi enthusiasts looking to enhance their cooking experience.
Ingredients:
– Bamboo or hardwood
– Sushi mat (optional)
– Sandpaper
– Food-safe finish
Instructions:
1. Cut the board to your desired size, typically around 12×12 inches for sushi preparation.
2. Sand the edges and surface until smooth for optimal performance.
3. Apply a food-safe finish to enhance durability and protect against moisture.
– Great for both sushi making and serving delicious rolls!
– Pair it with chopstick holders for a complete sushi set.
FAQs:
– Is it necessary to have a separate board for sushi? It’s ideal for maintaining flavors and hygiene.
20. Herb Cutting Board

Do you love cooking with fresh herbs? An herb cutting board is designed specifically for chopping herbs efficiently. Its surface often features measurements or guides, helping you prepare your ingredients quickly and keeping your cooking organized.
This board is perfect for anyone who wants to streamline their cooking process.
Ingredients:
– Hardwood board
– Measuring lines (optional)
– Sandpaper
– Food-safe finish
Instructions:
1. Cut the board to a smaller size for easy handling while prepping.
2. Sand the surface until it’s smooth for effective cutting.
3. Optionally, engrave measurement lines for added convenience.
4. Apply a food-safe finish to protect it from moisture.
– Perfect for fresh herbs like basil and cilantro!
– Use as a decorative piece when not in use for added charm.
FAQs:
– Can I use this for other foods? Yes, but it’s specifically designed for herbs for optimal chopping efficiency.
21. Cutting Board with Built-In Bowl

Want a cutting board that simplifies meal prep? This innovative design features a built-in bowl that catches your chopped ingredients! It’s perfect for keeping your workspace tidy and organized while adding a fun twist to your cooking routine.
This practical project is a great addition to any kitchen, especially for those who love to cook.
Ingredients:
– Hardwood board
– Small bowl (wood or ceramic)
– Wood glue
– Sandpaper
Instructions:
1. Cut your board to the desired size for your cooking needs.
2. Cut out a space for the bowl and secure it with glue.
3. Sand the edges and surface for smoothness.
4. Apply a food-safe finish to seal and protect your board.
– Helps keep your counter clean and organized during prep!
– Ideal for prepping fruits and veggies with ease.
FAQs:
– Can I replace the bowl? Yes, you can easily swap it out as needed.
Cutting Board with Built-In Bowl
Editor’s Choice


22. Mosaic Inlay Board
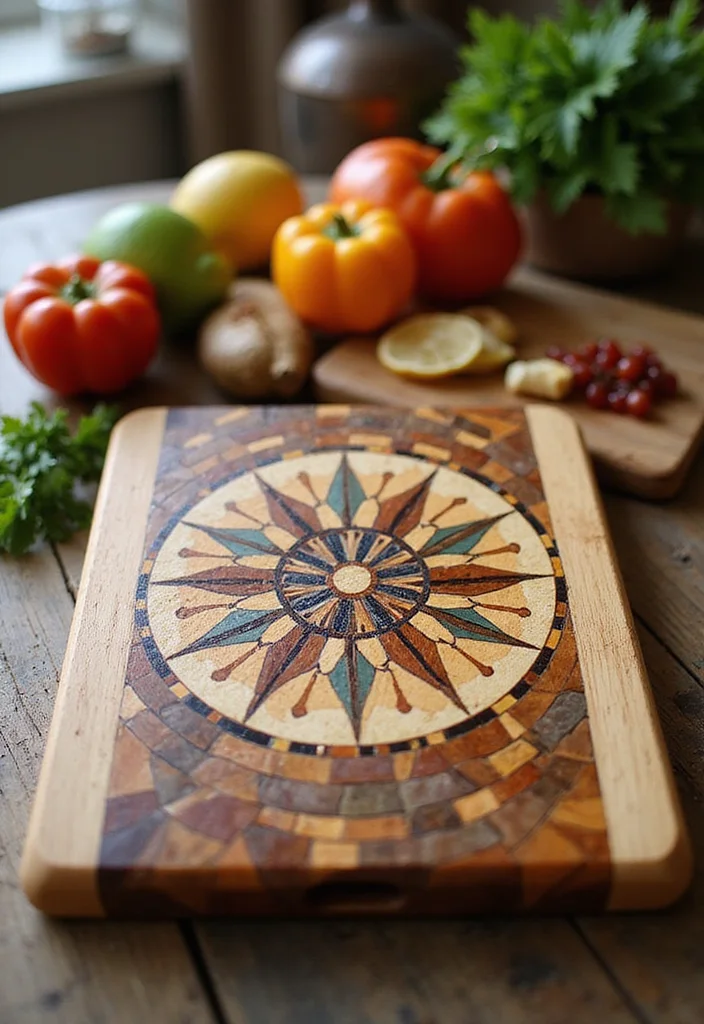
For the artist in you, a mosaic inlay cutting board allows your creativity to shine! By inlaying different colored woods or materials, you can create stunning designs that not only serve a functional purpose but also act as beautiful works of art in your kitchen.
This project is perfect for those who enjoy woodworking and want to showcase their artistic skills.
Ingredients:
– Various colored hardwood pieces
– Wood glue
– Sandpaper
– Food-safe finish
Instructions:
1. Plan your design using the colored pieces you’ve chosen.
2. Cut the woods to fit your design and glue them into place securely.
3. Sand the entire surface for a smooth finish.
4. Apply a protective food-safe sealant to preserve your artwork.
– Ensure you have a steady hand for intricate designs!
– This board is perfect as a decorative piece for your home.
FAQs:
– How do I maintain the design? Regularly oil and treat it just like any cutting board to keep it looking great.
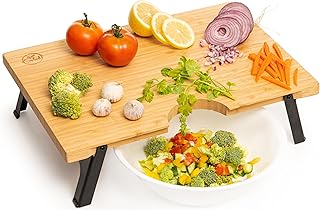
23. Portable Adjustable Cutting Board

Looking for a cutting board that can adapt to your needs? An adjustable cutting board that changes height is fantastic for those who love to cook whether standing up or sitting down. This design focuses on comfort and usability, making it a great addition to any kitchen, especially for individuals with limited mobility.
This project is all about enhancing your cooking experience.
Ingredients:
– Hardwood board
– Adjustable legs or mechanisms
– Sandpaper
– Food-safe finish
Instructions:
1. Cut your hardwood to the desired size for your board.
2. Attach adjustable legs that can lock in different heights for versatility.
3. Sand smooth for a comfortable working surface.
4. Finish with a food-safe sealant to protect your board.
– Ensure the legs are stable for safety during use.
– This is perfect for those who enjoy cooking at their own comfort level.
FAQs:
– Is it sturdy? Yes, as long as it is properly constructed.
Portable Adjustable Cutting Board
Editor’s Choice


24. Split-Level Cutting Board

Do you want to keep your kitchen organized while multitasking? A split-level cutting board provides distinct areas for various tasks, ensuring your workspace remains tidy. This design is perfect for those who love to cook while maintaining an appealing aesthetic.
This project is both functional and stylish, ideal for any chef.
Ingredients:
– Multiple hardwood pieces
– Wood glue
– Sandpaper
– Food-safe finish
Instructions:
1. Plan and cut your hardwood to create two levels for added functionality.
2. Secure the pieces together with glue for durability.
3. Sand the surfaces for a smooth finish that’s easy to clean.
4. Apply a food-safe sealant to protect your board.
– Perfect for chopping on different levels!
– Consider integrating a bowl holder for added functionality.
FAQs:
– Can I use it for multiple tasks? Yes! It’s designed to handle various cooking needs.
25. Custom Shape Cutting Board

Want to add a personal flair to your kitchen? A custom-shaped cutting board allows you to reflect your personality or interests in a fun way. Whether it’s shaped like a state, animal, or something else, these boards add a unique touch to your cooking space and make for memorable gifts.
This project is a fantastic way to express creativity while crafting.
Ingredients:
– Hardwood board
– Jigsaw for cutting shapes
– Sandpaper
– Food-safe finish
Instructions:
1. Sketch your desired shape onto the board for guidance.
2. Use the jigsaw to cut out the shape carefully.
3. Sand down any rough edges until they are smooth.
4. Apply a food-safe finish to protect the wood.
– This board is perfect for themed parties or as a decorative piece when not in use.
– It also serves as a great conversation starter!
FAQs:
– How do I maintain its shape? Just follow regular maintenance techniques for wooden boards to keep it in great condition.
Custom Shape Cutting Board
Editor’s Choice


Conclusion
Crafting your own DIY wooden cutting boards can be a rewarding way to spend your weekend. Each project not only adds a personal touch to your kitchen but also allows you to express your creativity. From simple designs to intricate patterns, there’s no limit to what you can create. Grab your tools and get started on a project that appeals to you! Remember, every board tells a story, and the best part is, you get to tell yours!
Note: We aim to provide accurate product links, but some may occasionally expire or become unavailable. If this happens, please search directly on Amazon for the product or a suitable alternative.
This post contains Amazon affiliate links, meaning we may earn a small commission if you purchase through our links, at no extra cost to you.
Frequently Asked Questions
What are beginner-friendly DIY cutting board projects I can finish this weekend?
Absolutely! For a weekend project, start with simple, beginner-friendly DIY cutting boards like a classic end-grain checkerboard, a live-edge board, or a basic-edge board with a juice groove. Gather food-safe hardwoods such as maple or beech, sand thoroughly, and cut to a standard size (about 12×9 inches). Clamp while you glue or join pieces, then sand smooth. Finish with a food-safe oil (like mineral oil) or a beeswax blend to protect the wood and keep it safe for kitchen use. DIY cutting boards like these are perfect for crafts and homemade gifts, and you’ll pick up essential woodworking skills quickly.
What tools and materials do I need to make DIY cutting boards at home?
Here’s a practical starter list: a saw (hand or power), a drill/driver, a random-orbit sander, clamps, measuring tape, square, and wood glue. For materials, pick food-safe hardwoods (maple, walnut, or cherry), and consider end-grain or edge-grain designs. You’ll also want a food-grade finish like mineral oil or a beeswax blend, and a clean workspace. Optional extras: a belt sander for quicker prep, a splined joining system, or a pattern for inlays to add a homemade touch. With these, you can start any DIY cutting boards project and craft something useful this weekend.
How should I seal and maintain DIY cutting boards to stay safe and long-lasting?
Seal your DIY cutting boards with a food-safe finish to prevent water absorption and warping.
Start with a thorough cleaning, then apply a thin coat of mineral oil or a beeswax blend, let it soak in, wipe off the excess, and repeat every few weeks or when the wood looks dry.
For long-term care, wash by hand with mild soap and water, dry immediately, and avoid the dishwasher. Re-sand and re-oil periodically, especially after heavy use. This routine keeps your cutting boards homemade and food-safe while preserving beauty.
Can I customize DIY cutting boards for gifts or crafts without advanced woodworking skills?
Definitely. Start with simple shapes like a rectangle or square and add decorative contrast strips, rounded corners, or a juice groove. You can personalize with inlays, engraving or a wood-burning design, or even paint-safe patterns if the board will be used for decoration. Choose easy-to-work-with woods (maple, beech) and use painter’s tape for clean lines. Finish with a food-safe oil so your gift is both stylish and useful. DIY cutting boards make thoughtful homemade gifts, even for beginners in crafts.
What are common mistakes to avoid when making DIY cutting boards?
Common mistakes to avoid include using soft woods or boards with defects, and skipping thorough drying and flattening—warped boards are no fun.
Don’t soak wood or use non-food-safe finishes on surfaces that contact food. Make sure all edges are rounded and the board is flat to prevent wobble.
Always use a food-safe finish and follow cure times. Finally, measure twice, cut once to minimize waste. With care, your DIY cutting boards will stay safe and durable for homemade use.
Related Topics
One thought on “25 DIY Wooden Cutting Board Projects You Can Make This Weekend (Get Ready for #9!)”
Comments are closed.


These projects look awesome! I once tried to make a cutting board and ended up with a really fancy serving tray instead. Let’s just say, my friends got a good laugh out of it!