

Blog
5 Mind-Blowing Herb Drying Rack Ideas That Will Transform Your Kitchen!

Why I made this post I love cooking with fresh herbs. They lift a dish and fill your kitchen with scent. But drying them at home used to feel messy and slow. I wanted a simple, affordable setup that fits a busy kitchen. These five ideas give you a neat, easy-to-use system that dries leaves fast and keeps their bright color and aroma.
Who it’s for If you grow herbs on a windowsill, buy in bulk, or hate wasting leaves, this is for you. You care about flavor, money, and time. If you cook in a small space or like a tidy kitchen, these ideas will fit your home and routine.
What you’ll get Five ideas that cover different spaces and vibes. From a sleek wall setup with magnetic tins to a compact countertop frame, and a hanging grid that uses vertical space. You’ll learn how to pick a design, assemble it, and keep airflow steady so herbs dry evenly.
Let’s break it down Each idea focuses on easy setup and steady airflow. You’ll see what materials are cheap and durable, how to space leaves, and how to tell when they are dry. Practical tips include handling herbs with stems, how long drying takes, and how to store the finished herbs so they stay strong in soups and sauces.
Next steps To start, measure your space, pick one idea that fits, and gather basic supplies. Install the rack, lay out the herbs, and check dryness daily. If you notice a musty scent or any mold, tweak the airflow or move the rack to a drier spot. With a little setup, you can dry herbs quickly and keep a bright, peppery aroma in every pinch.
Ready to see these ideas in action? You can turn a small table or a wall into an herb drying station. Fresh herbs dried at home taste better and last longer than store-bought options. The five ideas are waiting to be explored in detail.
1. Rustic Wooden Ladder Rack
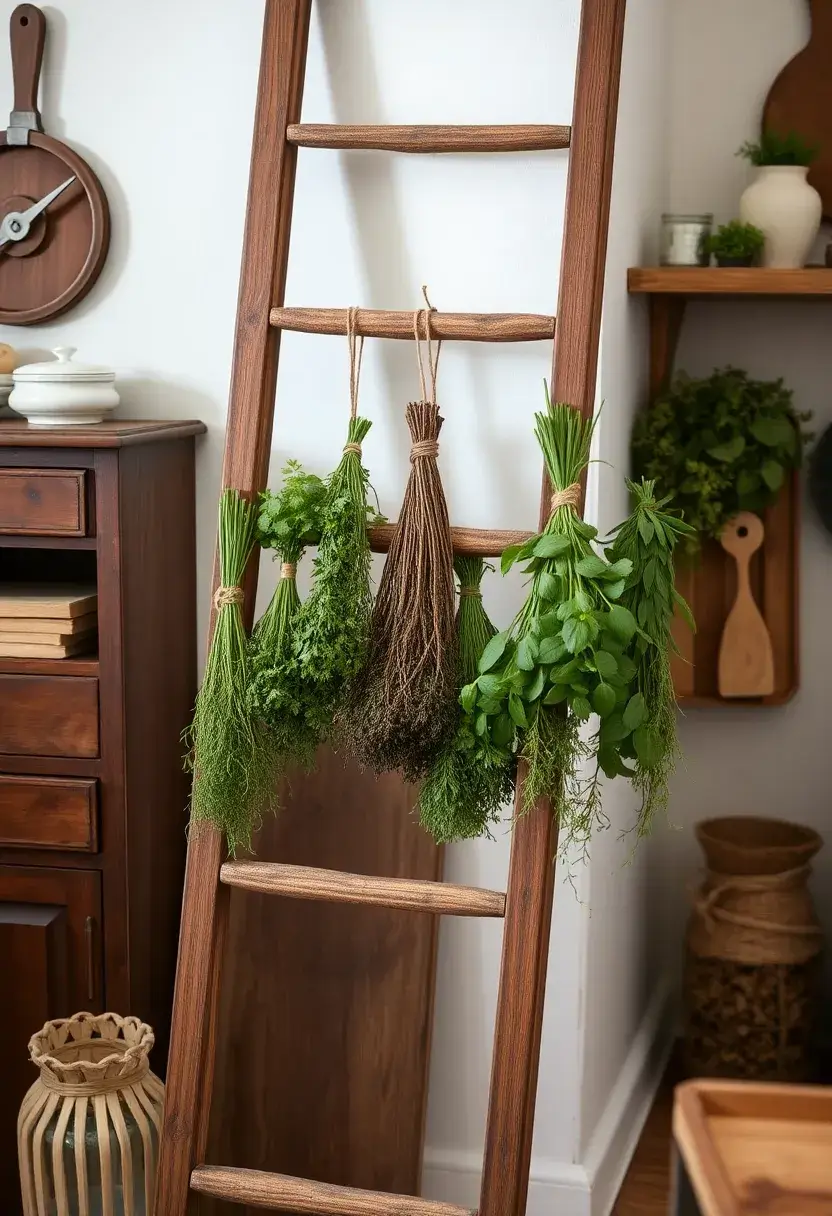
Want to dry herbs without crowding your counters? A rustic wooden ladder rack fits the bill. It adds warmth to your kitchen and keeps herbs airy as they dry.
Here is why it works. A ladder offers several levels, so you can spread out your herbs without stacking them.
Choose a ladder. You can repurpose an old wooden ladder or buy a new one. Sand it smooth and seal with a natural wood finish. Let it dry fully before you use it.
Next, set it up for hanging. Use twine or clothespins to hold bunches on each rung. Ideal herbs for this method are rosemary, thyme, and sage.
Let’s break it down. Place the ladder in a dry, dark spot. Good airflow matters, so avoid direct sun or heat. A shaded pantry corner or a quiet kitchen nook works well.
Tips:
– Use a ladder wide enough for ample spacing between herbs.
– Place a decorative tray beneath to catch falling leaves.
– Check on your herbs every few days; most are ready in a week to two weeks.
Beyond drying, this rack doubles as a warm decor piece in your kitchen.
Next steps: gather a ladder, finish, and herbs, then start drying.
A rustic wooden ladder rack not only keeps your herbs airy but also adds a touch of charm to your kitchen! Embrace creativity and repurpose an old ladder for a functional, stylish herb-drying solution.
1. Rustic Wooden Ladder Rack
Editor’s Choice

Blanket Ladder for the Living Room 6-Tier, Wooden Decorative Quilt Holde…

Tried & True Original Wood Finish, 8 oz. – Linseed Oil & Beeswax Blend, …

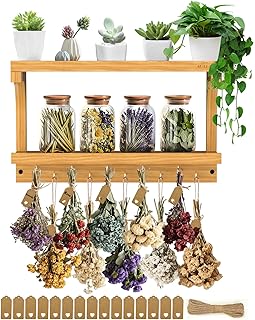
2. Hanging Mason Jar Rack
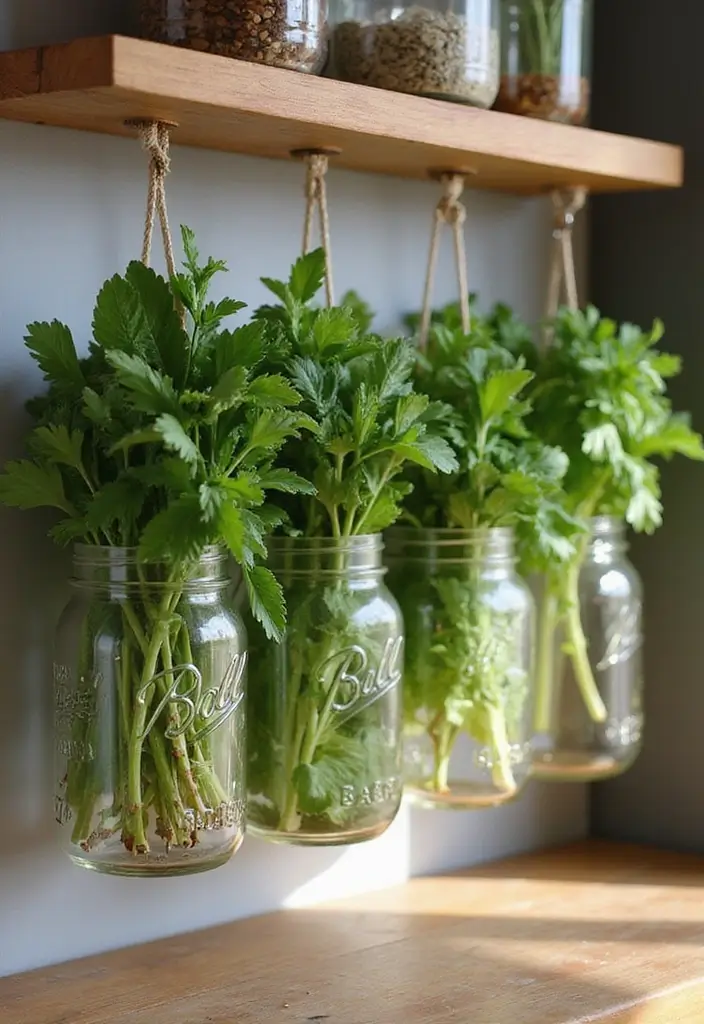
Need a simple way to dry herbs without crowding your counters? A hanging mason jar rack uses vertical space to dry herbs right above your prep area. The jars catch the soft light and sway a little as you move.
To set it up: grab several mason jars. Fill each jar with your favorite herbs, but don’t pack them tight. Thread twine through the lid rings or tie a loop around the jar neck. Hang the jars from a sturdy shelf, a rail, or strong hooks on the wall. Give each jar a little space so air can move around. Let the herbs air dry while you cook, not waiting for a shelf. Keep the jar lids clean and the twine tied tight. This setup works with many herbs. This arrangement saves counter space and makes drying feel easy.
Tips:
– Use colored jars to add a pop of color to your kitchen.
– Label each jar with the herb inside for quick picks.
– Hang them near your cooking area for easy access.
You can watch the jars slowly turn from leafy green to dry leaves, catching a hint of aroma as they dry. This method lets you dry several herbs at once without crowding your counters, and you’ll have fresh leaves ready when you need them.
Let your kitchen flourish with creativity! A hanging mason jar rack not only saves counter space but also adds a touch of rustic charm while drying your favorite herbs.
2. Hanging Mason Jar Rack
Editor’s Choice
Mason Jar Organizer, Mason Jars Rack for Food Storage, Canning Jar Holde…

Mason Jars 16 oz with Lids Colored Mason Jars Regular Mouth Canning Jars…

Anjmd Stainless Steel Wire Hangers for Mason Jars, 16 Pack – Tool Free I…
3. Vertical Wall-Mounted Rack
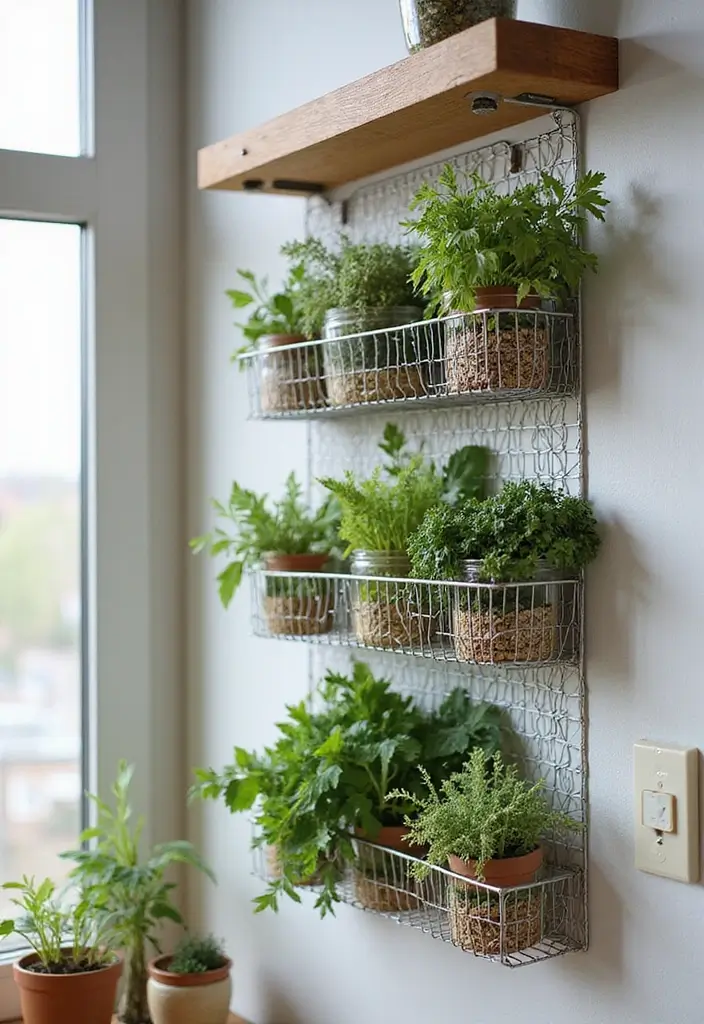
Looking to dry herbs without crowding your counters? A vertical wall mounted rack uses blank wall space and gives your kitchen a clean, organized look. Choose wire mesh for a light feel or wooden shelves for a warm, cozy vibe. Either choice keeps herbs in sight so you can grab them quickly, and it adds a bit of charm to the room.
How to set it up. Pick a wall with good air flow, not in direct sun. Measure the space for your tallest herb. Mount sturdy brackets or a rail. Attach hooks, strings, or mesh panels so air can move between shelves. Leave eight to ten inches between levels for the best drying.
How to use. Clip herbs by the stems and hang them with leaves facing out. Let air pass around each bunch. Check every few days and move drying pieces to spread airflow. When leaves feel dry and crisp, store them in jars or a paper bag for later use.
Tips:
– Arrange herbs by type or color for easy scanning
– Keep the rack in a well ventilated area to speed up drying
– Rotate and check each piece so it dries evenly
– Avoid direct sunlight to preserve color and aroma
Next steps. Start with two levels and add more as your herb garden grows. You’ll gain space, style, and flavor all in one wall.
Transform your kitchen with a vertical herb drying rack! Not only does it save counter space, but it also adds a touch of charm and keeps your favorite herbs within easy reach.
3. Vertical Wall-Mounted Rack
Editor’s Choice
AO LI GEI Herb Drying Rack Hanging 3 Tier Flower Drying with 12PCS Brown…

iPower 2ft 6-Layer Herb Drying Rack Breathable Mesh Hanging Dryer with Z…

Herb Drying Rack, Wooden Herb Drying Rack, Wood Pasta Herb Drying Racks,…
You might also like

4. Multi-Tiered Drying Rack
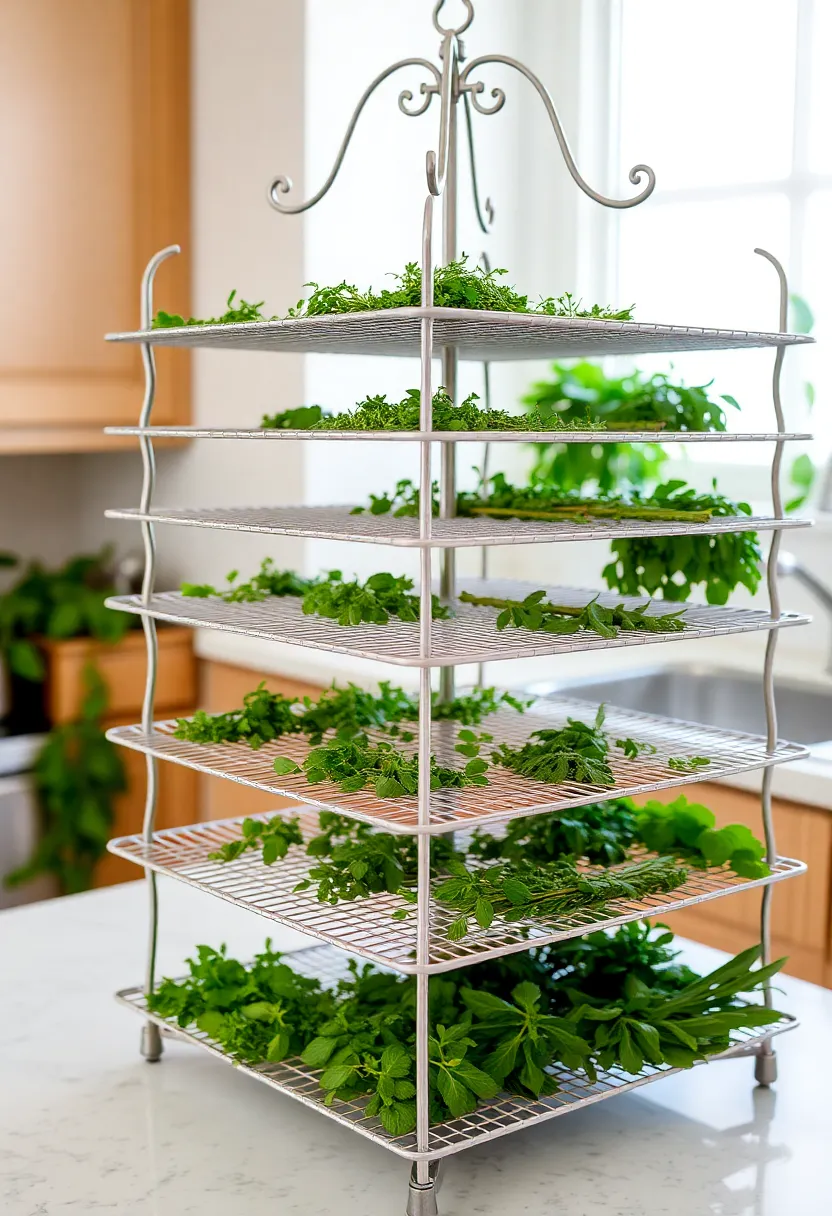
If you dry a lot of herbs, space and airflow matter. A multi-tiered drying rack gives you several shelves in one setup. You can dry different herbs on each level without them touching. The shelves stack like steps, so you save table space and keep things tidy. It also keeps stray leaves contained and cuts mess.
You can buy one or make a simple version at home. Use wood boards or a sturdy frame with removable trays. The goal is ease of cleaning and even air across every layer. Choose trays that are easy to lift and wash.
Place it in a warm, dry spot. A room corner with steady warmth works best. Keep the rack away from direct sun. A gentle fan nearby helps move air over the leaves. You get even drying on every level.
With this rack, you can dry more at once. You finish a batch faster and keep herbs neatly separated. Expect evenly dried leaves with less breakage and mess. It makes batch after batch easy.
Tips:
– Use a herb drying rack with removable trays for easy cleaning.
– Add a small fan nearby to boost air circulation.
– Label each tier if you dry different herbs.
Next steps: set up your multi-tier rack, lay out the herbs, and start drying. You’ll see the benefit in every jar.
4. Multi-Tiered Drying Rack
Editor’s Choice
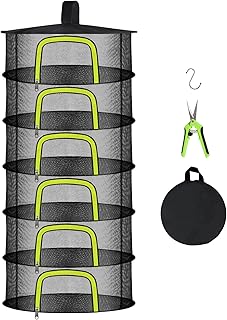
6 Layer Herb Drying Rack, Herb Drying Rack Hanging Mesh, Foldable Plant …

XPOWER P-230AT Mini Mighty 1/4 HP 925 CFM Centrifugal Air Mover, Carpet …

MONEST (250pc/Roll) 3″x2″ Floral Pantry Labels | Mason Jar & Bottle Labels
5. Magnetic Herb Drying Strips
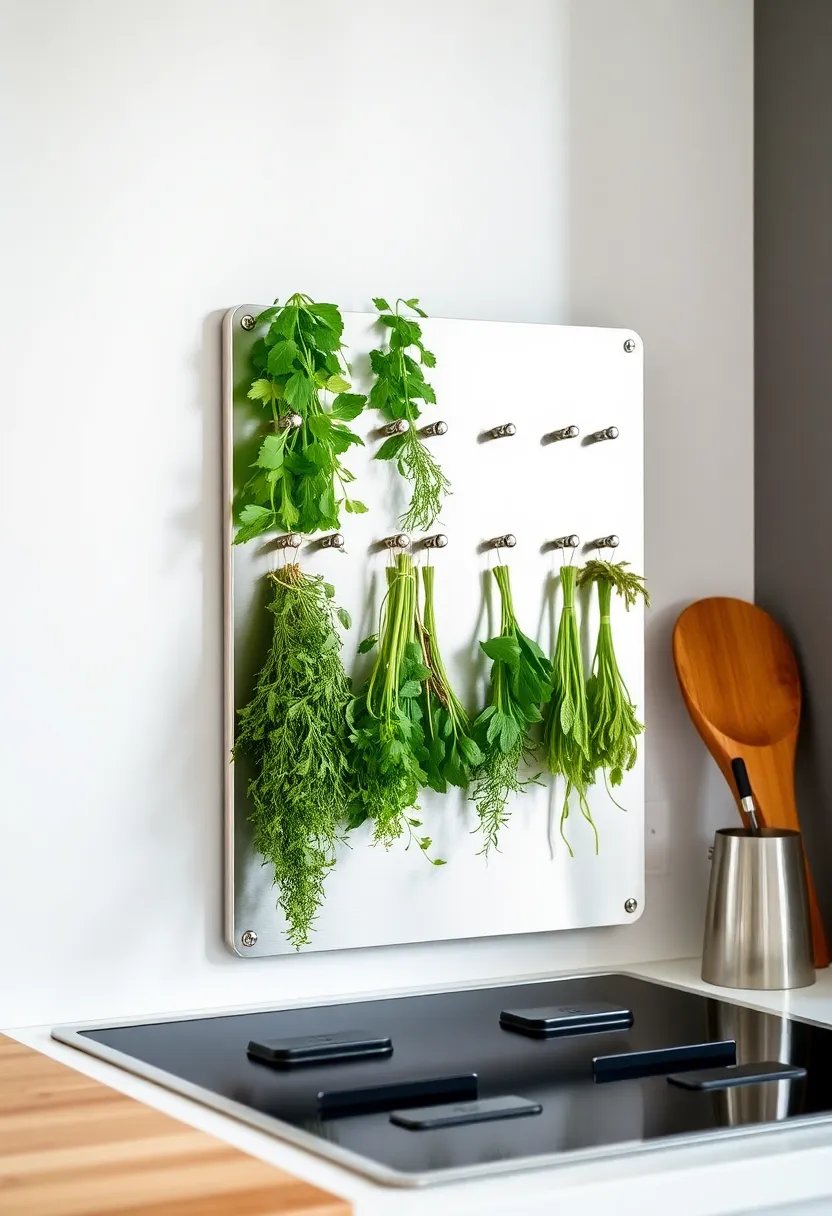
Need a space-friendly way to dry herbs? Magnetic herb drying strips offer a flat, low-clutter setup. They grip a metal surface and hang herb bundles where you can see them.
What you need
– Magnetic drying strip
– A metal surface such as your fridge or a metal board
– Silicone bands or ties
– Fresh herb bunches
– Scissors to trim stems
How to set it up
– Clean the metal surface and the strip so nothing sticks or drips dust.
– Attach the strip to the surface. Check that it is level and strong enough for weight.
– Gather herbs, trim stems, and tie each bunch with a silicone band.
– Press each bundle against the strip with the leaves facing outward. Let air flow around them.
Here is why this works
– Air moves around the herbs. Drying is even and steady.
– The strips keep herbs visible and easy to grab for cooking.
– You can arrange herbs by color for a pleasant kitchen display.
Tips:
– Choose a strip with strong magnets to handle heavier bunches.
– Use silicone bands to keep ties snug but not tight.
– Create a colorful line of herbs on the strip for a chic look.
Next steps
– Check herbs daily and remove when dry.
– Store in jars or bags once crisp.
5. Magnetic Herb Drying Strips
Editor’s Choice

6 Layer 24″ Herb Drying Rack Hanging with Garden Pruning Shears, Large Z…


SKOCHE Spice Jars 20 Pack Small 4 oz Glass Jars with Airtight Hinged Lid…
Conclusion

With these creative herb drying rack ideas, your kitchen will not only become more efficient but also visually stunning! Whether you opt for rustic styles or modern solutions, each method provides a unique way to integrate herbs into your cooking and decor.
Try out these hacks, and enjoy the process of drying herbs that will elevate your culinary adventures. Don’t forget to share your favorite designs and experiences — we’d love to hear how you’re transforming your kitchen!
Note: We aim to provide accurate product links, but some may occasionally expire or become unavailable. If this happens, please search directly on Amazon for the product or a suitable alternative.
This post contains Amazon affiliate links, meaning I may earn a small commission if you purchase through my links, at no extra cost to you.
Related Topics


